simple 1 ton tj

this is what my tj well look like when it is finished
 

Attachments

  • 311019_10150393167772629_650142628_10330542_468860714_n.jpg
    311019_10150393167772629_650142628_10330542_468860714_n.jpg
    69.7 KB · Views: 1,505
I ran a stock master cylinder and an adjustable proportioning valve inline going to the rear. Typically had it set at about 60% on top of the stock TJ's proportioning which was still in place. The rear was a FF dana 60 with disc conversion.
 
2012-03-23_17-54-04_761.jpg
2012-03-23_17-53-54_343.jpg
2012-03-23_13-40-06_826.jpg
2012-03-23_17-51-56_671.jpg
need to deff change the name of this post. got my lower trac bar bracket built and the upper welded on moved my coil retainers and some how made my trac bar to short even after measuring about a hundred times:wtf: hopefully the front well be totally done by sunday. and i can start on the rear...
 
2012-03-30_18-57-11_628.jpg
little update got the 14 bolt in just need to finish up the welds then its off to the gear man. i cant wait to get this thing done.
 
Thanks bro. Just read your build thread very nice. And thanks for your service. How long do u think it well be tell your done
 
2012-04-13_18-22-09_220.jpg
Well after all the measuring it coudnt have come out any better.All that is really left is brakes and i got to get josh at universal to shorten my front drive shaft and we should be ready for a shake down run.
 

Attachments

  • 2012-04-13_18-22-30_201.jpg
    2012-04-13_18-22-30_201.jpg
    123 KB · Views: 568
little update got everything finished it drives great zero problems. stops a hundred times better than any stock jeep dreamed of using stock mc (thanks jeremy /curtis/bailey).
 
update pics
 

Attachments

  • 535350_3911349341612_1215738914_3642449_444463859_n.jpg
    535350_3911349341612_1215738914_3642449_444463859_n.jpg
    103.1 KB · Views: 822
  • 412105_3822281674976_1215738914_3615448_2011701719_o.jpg
    412105_3822281674976_1215738914_3615448_2011701719_o.jpg
    181.9 KB · Views: 793
/
 

Attachments

  • 528705_3783115655850_1215738914_3602757_1488483856_n.jpg
    528705_3783115655850_1215738914_3602757_1488483856_n.jpg
    100.9 KB · Views: 750
Got some small stuff done figured id post it up. Got my savy tail gate, ordered psc tramp stamp and big hit bumper from swag. It came time to change trans fluid so i figured it was best time to do upgrades installed drain plug and trans temp and ordered derale trans cooler with fan.. today i went by chris and had him burn me up a double sheer pitman arm
 

Attachments

  • DSC_1074.JPG
    DSC_1074.JPG
    165.1 KB · Views: 890
  • 2012-08-10_16-55-06_848.jpg
    2012-08-10_16-55-06_848.jpg
    85.6 KB · Views: 945
  • 2012-04-27_16-39-34_760.jpg
    2012-04-27_16-39-34_760.jpg
    93.9 KB · Views: 866
  • 2012-08-13_19-23-00_851.jpg
    2012-08-13_19-23-00_851.jpg
    83.4 KB · Views: 876
thanks. also did the steering arm side double sheer still waiting on my gusset too finish it up. pics of it actually in the woods if u can believe that
 

Attachments

  • 2012-06-09_17-59-05_261.jpg
    2012-06-09_17-59-05_261.jpg
    126.4 KB · Views: 840
  • DSC_1080.JPG
    DSC_1080.JPG
    144.1 KB · Views: 822
I installed a durango 160 amp alternator today direct bolt on other than some wiring i upgraded. It truely is a great upgrade i tried pulling down the battery with the winch and the battery indicator never moved.
The one on the left is stock one on the right is durango
 

Attachments

  • 2012-07-20_15-43-09_422.jpg
    2012-07-20_15-43-09_422.jpg
    97.1 KB · Views: 601
finally got to go play a little happy dove season
2012-09-01_18-50-46_326.jpg
 
Been a while since i updated the build page. I have really enjoyed the one tons and the freedom they have given me (selectable locker is awesome). I finally got around to trimming the rear fender gained about 2". Swag offroad big hit bumper installed, Also got my poison spyder hood louver installed.
 

Attachments

  • 2013-01-10_16-43-01_837.jpg
    2013-01-10_16-43-01_837.jpg
    152.1 KB · Views: 742
  • 2013-01-10_15-43-57_843.jpg
    2013-01-10_15-43-57_843.jpg
    84 KB · Views: 735
  • 2012-10-17_12-38-55_719.jpg
    2012-10-17_12-38-55_719.jpg
    111.6 KB · Views: 753
  • 2012-10-17_12-39-10_530.jpg
    2012-10-17_12-39-10_530.jpg
    106.2 KB · Views: 711
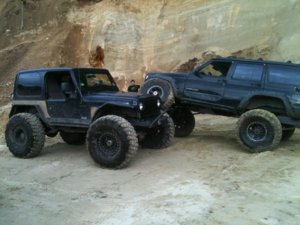
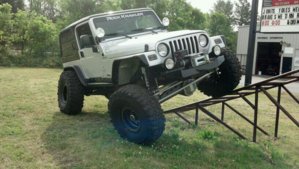
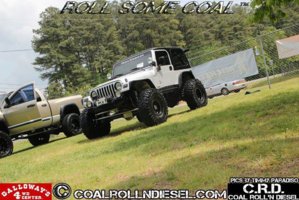
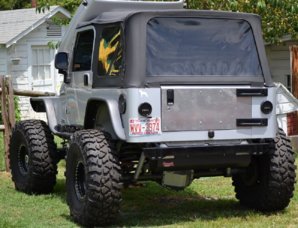
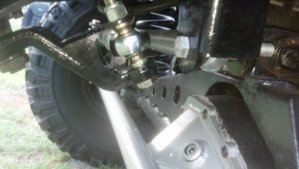
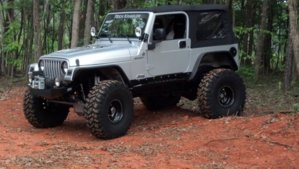
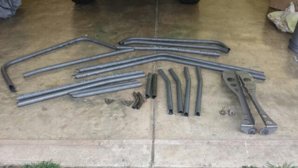
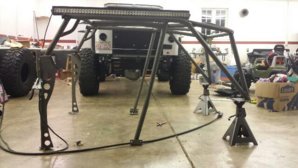
Getting ready for my spring project and its down to stretch the front 5"(16" fox coilover res, behind axle steering,ballistic brackets, drive shaft, genright coilover hoop kit) or put a cage in it and a few minor upgrades (Poison spyder full cage with tie in and grab handles, monster liner tub, swag lifted body mounts change upper control so it is adjustable at both ends) .really going to boil down to money
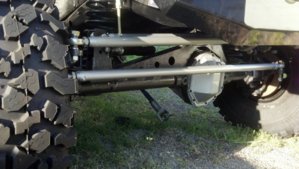
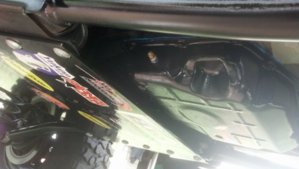
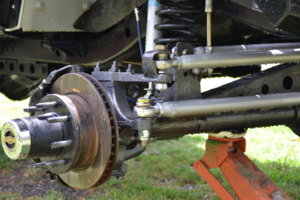
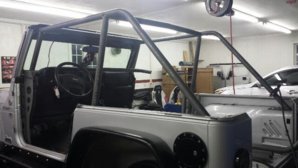
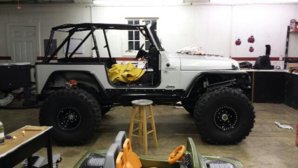
 
learned how to paint and finally got me a set of half door's
 

Attachments

  • IMG_20130726_105447_238_resized1.jpg
    IMG_20130726_105447_238_resized1.jpg
    41.3 KB · Views: 574
  • IMG_20130726_110255_251_resized1.jpg
    IMG_20130726_110255_251_resized1.jpg
    41.6 KB · Views: 570
  • IMG_20130726_221122_785_resized1.jpg
    IMG_20130726_221122_785_resized1.jpg
    47.4 KB · Views: 542
damn last time I was on was jan a lot has changed I finally got me a shop
 

Attachments

  • IMG_20130401_203222_999.jpg
    IMG_20130401_203222_999.jpg
    5 KB · Views: 588
Getting everything layed out for the cage. Also put in a few more orders to poison spyder.
 

Attachments

  • rps20130807_181636_460.jpg
    rps20130807_181636_460.jpg
    37.2 KB · Views: 536
Got the cage tacked up it fit perfect. Hopefully ill get it pulled out and welded up tomorrow. Also ordered a 50" led bar and ps mount.
 

Attachments

  • rps20130813_220757_357.jpg
    rps20130813_220757_357.jpg
    35 KB · Views: 600
  • rps20130813_220818.jpg
    rps20130813_220818.jpg
    25.9 KB · Views: 551
  • rps20130814_221348_253.jpg
    rps20130814_221348_253.jpg
    25.9 KB · Views: 538
Pulled the cage to finish up welding. I ended up getting it out by myself as my tractor couldnt get high enough to pull it over the tub all most feel out of the back of the jeep. My new welder is awesome make welding a breeze. Also got in my 50" led bar which is boss.
 

Attachments

  • rps20130814_221423_838.jpg
    rps20130814_221423_838.jpg
    42.1 KB · Views: 537
While I was waiting on my cage to come back I lined the inside of the tub and the outer railes turned out great. Also decided to put a double din in the dash they had them on sale at freemans so I picked one up and a set of new speakers for the dash. I will try to do as detailed a job as I can on the install as there was not alot of info on these mod. That brings us up to last night when I got my cage back from the powder man. My cage wouldnt fit ended up busting the front glass out cause the lower front spreader bar was hitting the glass. Had a hell of a time getting the soft top on so yeah then
 

Attachments

  • rps20130827_194053_286.jpg
    rps20130827_194053_286.jpg
    36.6 KB · Views: 668
  • rps20130827_194124_459.jpg
    rps20130827_194124_459.jpg
    37.3 KB · Views: 718
  • rps20130827_194258_253.jpg
    rps20130827_194258_253.jpg
    37.2 KB · Views: 652
The double din was fairly easy to do as long as u now a little bit about fiber glass. I started off by picking up a 08 jk double din install kit basically 2 brackets to hold it in the dash. I removed the outer lip I also had to remove some of the plastic that was below the upper vents. After that the dd would slide in. I bolted it to the bracket wired it up and that was the easy part. The fun part was molding the face ring into the dash. I marked what needed to be cut out removed that set the ring in problem was the dd is not as wide as the stock st up so I used the face ring from the old cut it and glassed it in.. Once it was good and cured I still had pretty good size gaps so I took blue masking tap tapped the back side of the plate mixed some resin and poured it in the cracks I just left the tape on the back it made the whole face plate strong. After that tedious sanding and bondo and now it looks like the jeep was made that way .I used dupli color bedliner as the paint and just backed it up farther while I was painting it to make it not so textured
 

Attachments

  • rps20130901_195656_307.jpg
    rps20130901_195656_307.jpg
    19.5 KB · Views: 546
  • rps20130901_195454_752.jpg
    rps20130901_195454_752.jpg
    34.2 KB · Views: 514
  • rps20130901_195741_975.jpg
    rps20130901_195741_975.jpg
    27.4 KB · Views: 587
Back
Top