Project: Tetanus Shot - 1948 Willys

Ordered a 4x8 sheet of 1/4 and a stick of 1.5x.120 dom from race city and picked it up friday. I figured a simple belly skid would be easy to fab and mount up.

33C3B0CE-708A-44CD-BE85-01F5E61C61D8.jpeg


Wrong. Stopped by @getstucksome house on Saturday and put a game plan together. I’m planning on redoing the trans crossmember and anti wrap crossmember. That should allow me to push the drivetrain up another 2” or so and give me a flatter belly.

Got the rear crossmember pulled this morning and that’s when I found of the trans mount studs was bent. Only way to replace it is to pull the transfer case.

D82F2BE8-70A6-40E1-B1F5-882CA52A7913.jpeg

Now that the case is out, I might as well leave it on jackstands and do more fun things.

I think I’ll be able to easily fab new crossmembers that are higher than the originals. I was never happy with the originals so this is a good chance to redo them.

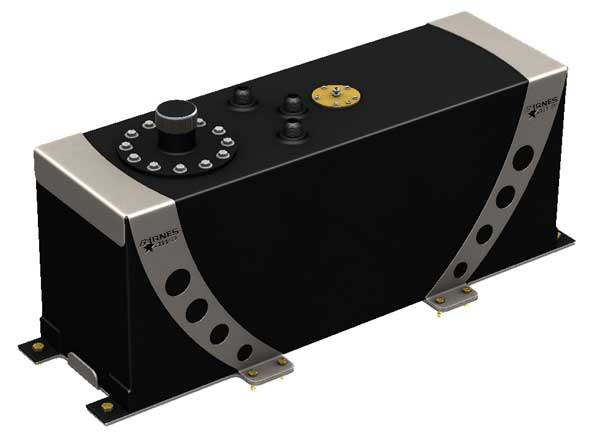
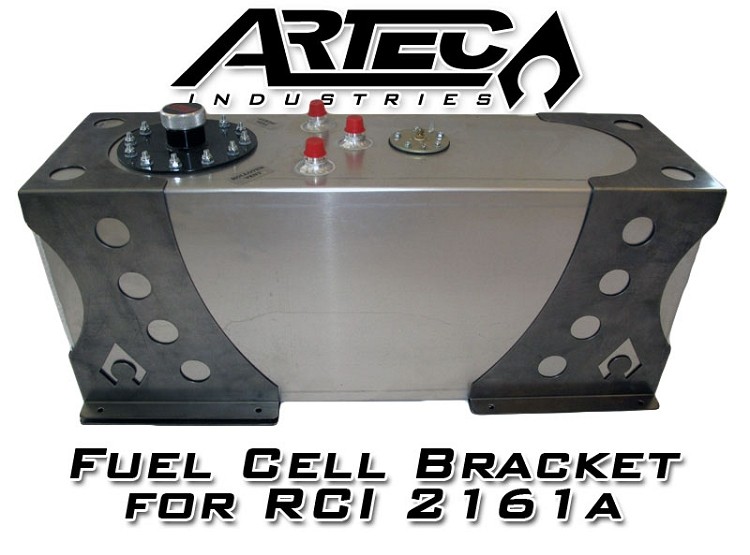
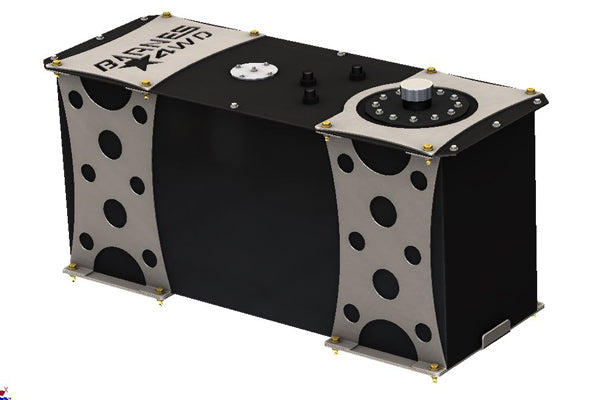
Plan is to flip the rear springs, that will net me around 7.5” of additional wheelbase. I’m currently sitting around 90ish so this is gonna be a huge help. Driveshaft will be dropped off at Olivers again to get lengthened. There is a possibility that the rear differential will now contact the gas tank. Once I cycle the suspension and confirm that it does, I’ll be ordering a new tank to go in the rear. Hopefully it doesn’t, rough math puts it close but clear.

Once it’s all put back together, I’ll be looking for a set of chromos and larger tires. I’m thinking something in the 38-39” flavor.
 
1665512503637.png


Crossmember is in as of 11PM last night. I was able to push the drivetrain up quite a bit and I should be able to skid the entire drivetrain now. Bottom of the transmission is the lowest part and it will clear the bottom of the 1.75 crossmember by about 1/4". Redid the transmission mount so I can unbolt independent of the crossmember. I'll definitely have to cut more floor out to get the transfer case in. Ordered a few more crossmember mounts from Barnes today so I should be able to keep going. Planning on flipping the rear leafs tonight.
 
One GIANT leap forward, a few small steps back....

1665579791393.png


1665579804379.png


Flipped the rear leafs last night. I went from 88" hub to hub to 100" at ride height. I knew going in that at the bare minimum I would have to lengthen the driveshaft, redo the anti-wrap crossmember, and rework the shock mounts on the axle. My pinion angle got a lot better pushing the rear back but now the differential is definitely going to impact the gas tank.

1665579836889.png


My tank is roughly 22" L x 14" W x 10" Tall. I searched for a few hours last night on different style tanks and sizes and nothing will work.

I really don't want to put it in the bed as I'll lose a lot of valuable floor space. RCI's 12 gal tank measures 30" L x 10" W x 12.5" Tall. The 10" width would be ideal but frame rail to frame rail is 25" so the length kills it. I'm not opposed to cutting a hole in the floor and recessing the tank in between the frame rails either, just trying to minimize the impact to the bed area.

So now I need some recommendations on fuel cells or do I get a custom one made? Or do I just buy an RCI/mount and slap it in the bed? I did a lot of thread reading last night and it seems that at one time RCI was horrible for seams splititng. I'm assuming that the issue has been fixed but I want some options. Additionally, do I go ahead and put in an internal pump in and ditch the external?

I'm going to keep plugging away on this and hopefully get the transfer case back in tonight so I can continue working on crossmembers/skid placement.
 
I think most of the RCI fuel tank seam cracking problems disappeared once people started mounting them properly. I have never owned one of these.


Could you bump stop it in the center? Looks can be deceiving, but it seems you have 5" of space in there. I'm sure that would go away with some weight in the back.
 
@ghost I'm not opposed to getting a new tank/tank location at all. I really like the WB where its sitting now so with custom springs I would lose some WB.

@drkelly that was my thoughts as well that the issues have been resolved.

@justjeepin86 that is definitely a viable option. I need to spend some more time with a tape measure on the rear but this could be the fix that is needed. The current bump stops could easily be cut off and moved to be centered above the spring pad.

I do not think RCI did anything new, other than starting to recommend these: Racer's Choice Inc.. The mounts seem to help for sure, and there are other vendors selling tanks now too.
 
There's a graph/list somewhere that shows leaf spring lengths and where thew center hole lands out there somewhere.

There is also sdtrucksprings.com that if you pick an application (say Silverado 1500 2001 2wd short bed) will tell you specs such as length, center to end, arch, and rate in their description. This is good if you find a set that looks good and want to know what the specs are


Attachments

  • CEE6E776-0672-4DEE-8C39-BD54D7B6C1D5.png
    CEE6E776-0672-4DEE-8C39-BD54D7B6C1D5.png
    657.6 KB · Views: 74
Last edited:
There's about 5" of space between the diff and the rear tank. 7" or so between the spring pad and the bumpstops. I'm just going to switch to an in cab tank. It's a bit more money but I'll have a better end product out of it. Now I just need to figure out what kind of in tank fuel pump I need to run.
 
Transfer case is in. Tucked it up even more than last time. I'm going to ditch the cable shifters for now and try to build some linkages. Planning on pulling the tank tonight and start working on the antiwrap bar crossmember. Re-measured my driveshaft and it looks like I need about 10.5" more.
 
Lot of progress. Crossmembers are in and skid plate is mounted. Added a third mount for the crossmember on the driver side and snaked a tube between the oil pan and transmission. I think it came out pretty good.

A8AB09EB-6FD8-4AD2-AEDE-24B2302FDDF3.jpeg


Added a piece of bent tube for protection for the front driveshaft. Luckily had some scrap tubes leftover from the cage that worked perfectly.

08BC85A7-A10F-482B-AB2C-3146E5066740.jpeg


Added some gussets to support the bolts/nuts to hold the skid plate. Got it all painted up and installed tonight.

85999BDE-FB25-47E5-8A66-87D04B3C6C30.jpeg


Pretty happy with how this turned out.

Picked up my “new” extended driveshaft from Oliver’s. Dropped it off on Friday, picked up Wednesday. Good people for sure!

Moving on to traction bar. I need to redo the mount since I’m no longer using that rear most crossmember. I’m currently at this point.

F5941990-A953-4D36-8912-CE5949B78330.jpeg


I plan on adding a tube off the end of the “crossmember” and tie it back into the frame at an angle and then tie another tube into it off the seat tube/cage around 30 degrees from top of main tube. I’ll then plate the frame around the main tube for added strength. My only concern is the angle of shackle. This is about as vertical as I can get it and still have some range of motion. I can’t push it up any further as it’s already at the top of the C channel frame.

Thoughts?
 
Got the anti wrap bar mount pretty much done and welded to the frame

1668008662031.png


1668008684906.png


Made another support and tied it into the bottom of the seat brackets for the cage

1668008716346.png


Last night was spent cutting and shaping 1/4" plate to plate the C channel frame around the mount. Three pieces in total, need to clean the piece up a tad but its ready to be welded in as well.

1668008783454.png
 
Anti wrap bar is complete and painted. Built a steering box skid as well. It's welded to the bottom and the 3/8" gusseted steel that the steering box is bolted too.

I held it as tight as I could to the box without touching, I think it came out pretty well.

1668616169950.png


Got the driveshaft installed as well but it looks like I need to clearance the body a bit more for driveshaft uptravel. I have about 2" of driveshaft up travel before it impacts the body and about 6" or so of travel on the rear leaves until the bumpstops. The potential intereference is around 5-6" back from the CV yoke off the transfer case so I'm wondering if the rear would ever compress enough to make it hit. I'll be cycling the rear suspension to confirm before I go cutting.

Things to do:
- reweld rear shock mounts to front of axle. Still need to cut the old tabs off and order new ones
- ordering motobilt fuel cell this friday/plumb/mount and install. Already have the TJ fuel pump, still need a pressure regulator
- figure out shifters. I want to ditch the cable shifters and use some solid rod/heims for the transfer case. I have a design sketched out in my head which I think will work. Heims will be here tomorrow from Speedway Motors so I can start laying them out
- install rock lights/wiring - parts are here/ordered

Go wheel it
 
Picked up a motobilt fuel cell kit over Black Friday through EOF. Also got a bunch of misc tabs/brackets. Still need to wire/plumb the fuel cell. Rock lights are installed, just need to secure some wiring.

1669648947538.png


Trying to hunt down the correct connector for the fuel pump. Motobilt sent me the only one they have, obviously it won't work. Fuel pump connector on the left.

1669649144207.png
 
Cut out the pumps wiring harness and wired in a basic 4 wire male/female connection. I don't have a gas gauge yet so I'll just leave those two wires for now. Pump works, got both fuel lines ran and added some ziptie tabs to clean up fuel lines/tank wiring. Had a few free hours on Friday, got the rear shock tabs made and mounted/installed. Since I stretched the rear, I had to move the shock tabs to the front side of the axle. Decided to add some additional 1/4" plate to the tabs for strength etc.

1670256511042.png


1670256525897.png


All thats left now is transfer case shifters and building a trans cover.
 
After some mockups and prototypes of hardmounting the shifters, I decided to go back to the cable shifters. If it ain't broke, don't fix it. I did make a new transfer case mount for the shifters that came out pretty nice and sits lower than the previous mount.

1670504724295.png


1670504747727.png


1670504764252.png


Added some more zip tie tabs and dumped 5 gallons of gas in the tank. Cycled the pump twice to prime the lines and she fired right up:cool:

Still need to reinstall seats/belts but I'm going to leave them out for the time being so I can build the trans tunnel cover.
 
Even with the cold temps, still a lot of work has been completed.

Worked out some CAD prototypes. Everything will be bolted to the cage/seat supports with trick tabs so every panel is removable.

1671630906010.png


Grabbed a half sheet of 1/8" from Race City and started cutting.

1671630952935.png


Finished up the main tunnel cover last night and got everything sprayed down with Raptor liner.

Should start reinstalling everything later today.
 
Got the tunnel buttoned up and installed. Reinstalled all the electrical and she fired right up again. Had to clearance a bit more around the seat mounts on the passenger side. Also reinstalled the passenger seat. All I need to do is reinstall drivers seat and I should be good to go.

1671725469339.png
 
Went to go hotlap it around the neighborhood and found out I couldn't shift the transfer case. I didn't have enough throw in the levers to actuate the cables. Cut and reweld the shifter levers and it shifts easily now. Hot lapped it a few times around the neighborhood. Feels a lot more stable now and traveled down the road pretty good in 2wd. I'd like to have a bit more brake pedal feel but the brakes are working well. I can always swap in a larger master cylinder in the near future. After the hot laps, the upper radiator hose started leaking from the thermostat area. Hose was trashed so just replaced. I also need to add one more exhaust hanger.

In more exciting news, planning a trip to Gulches February 3-5. Already booked a campsite(7). Hoping to have a good break in run on most of the trails and see what works and what doesn't.
Gulches in 1.5 hours from the house. If I can swing it I'll come for the day on the 4th. Who all's coming with you?
 
Back
Top