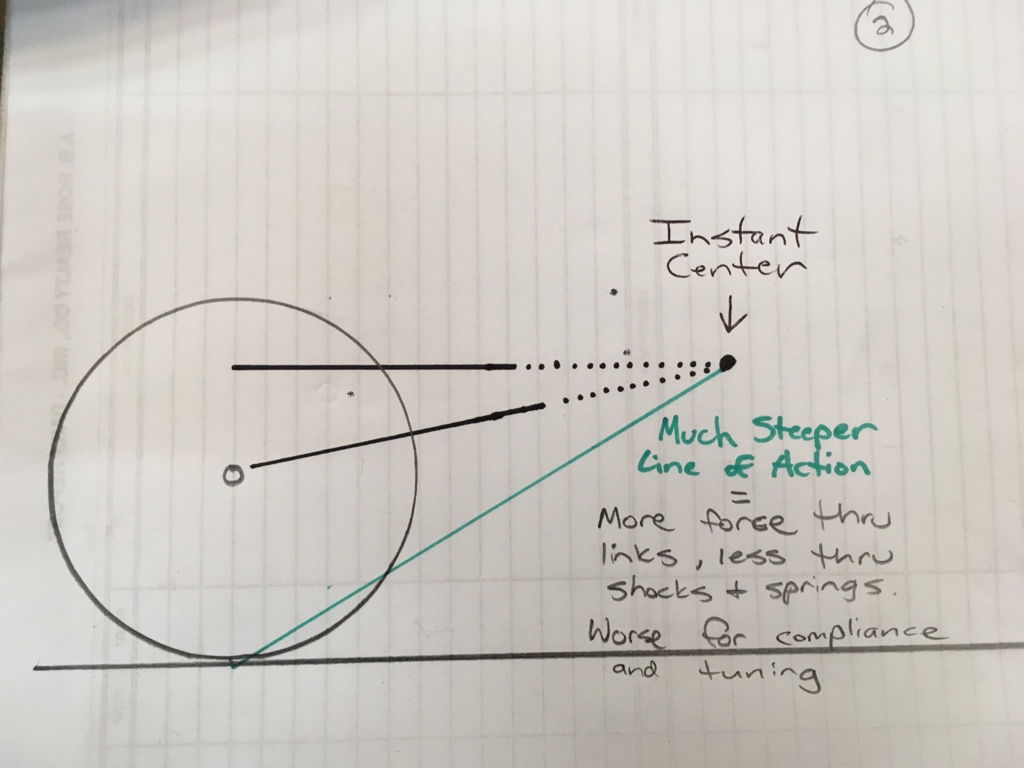
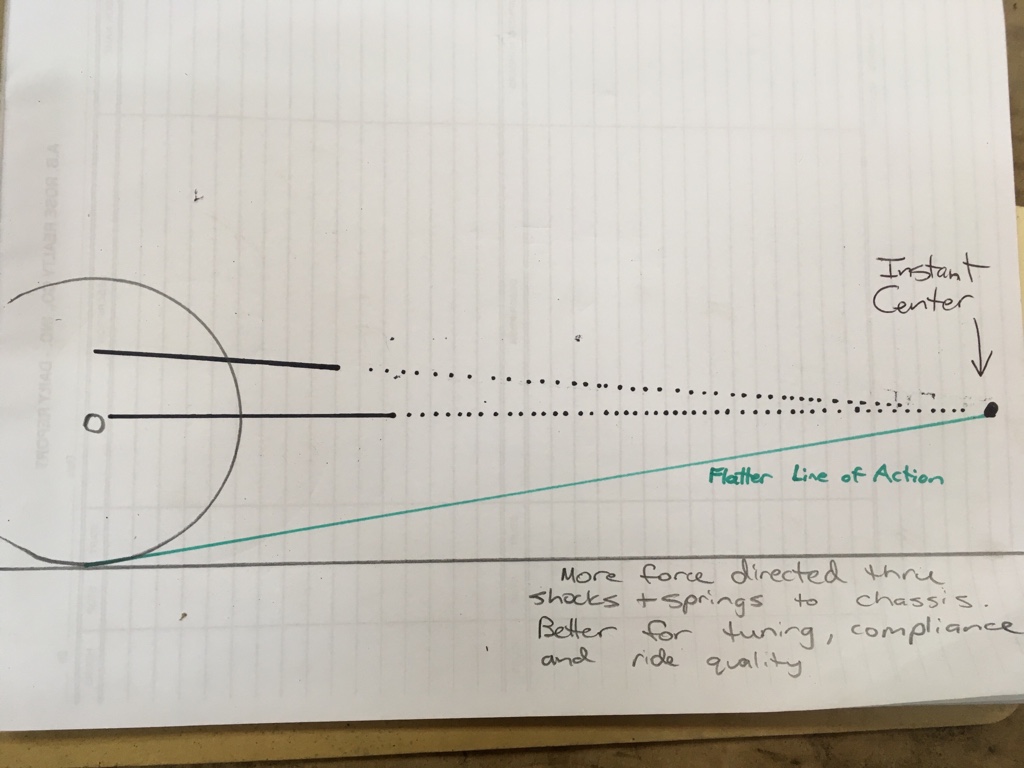
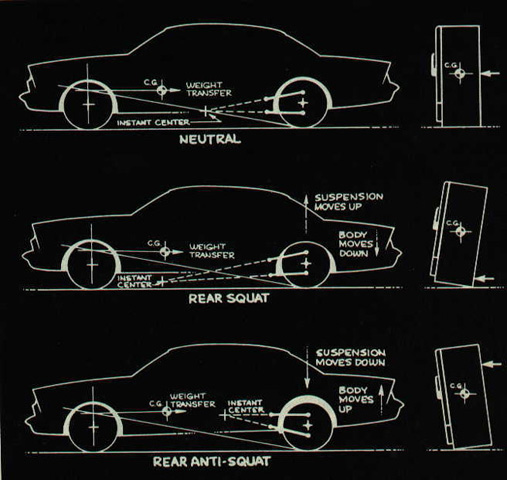
I'll just leave this here.
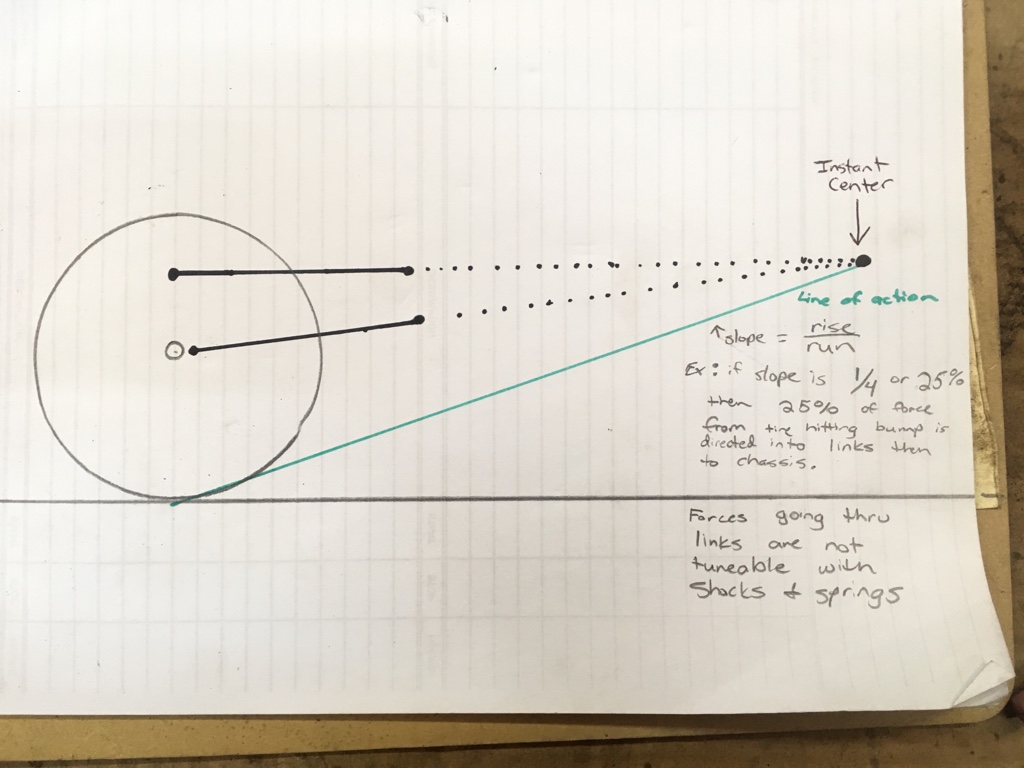
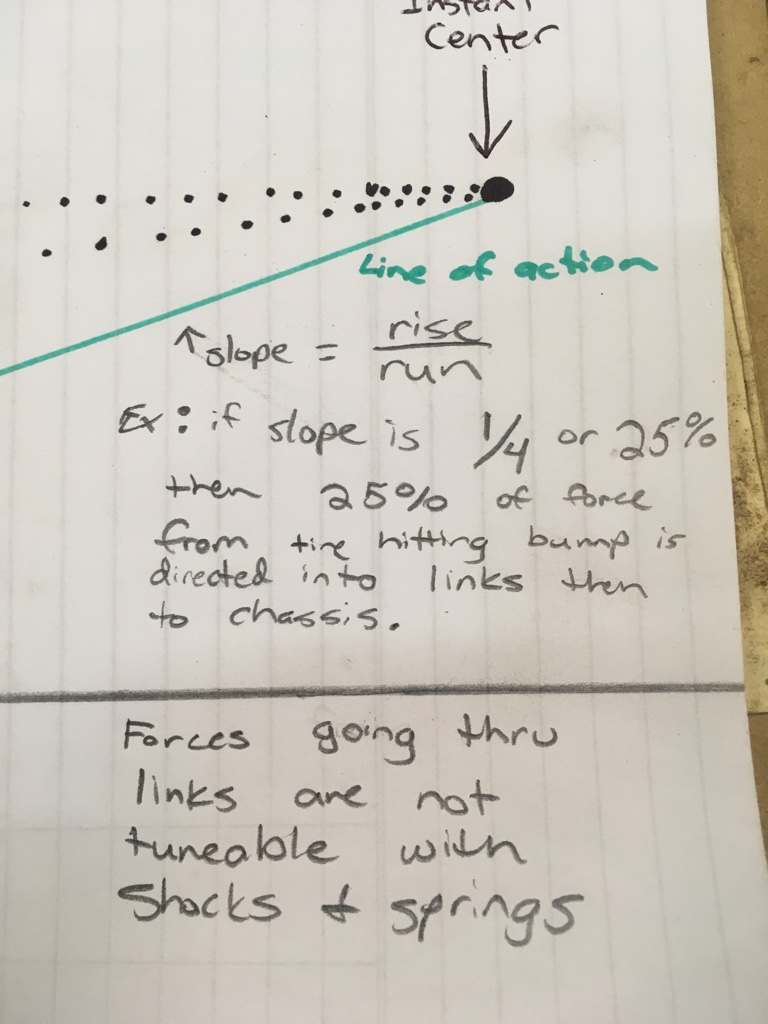
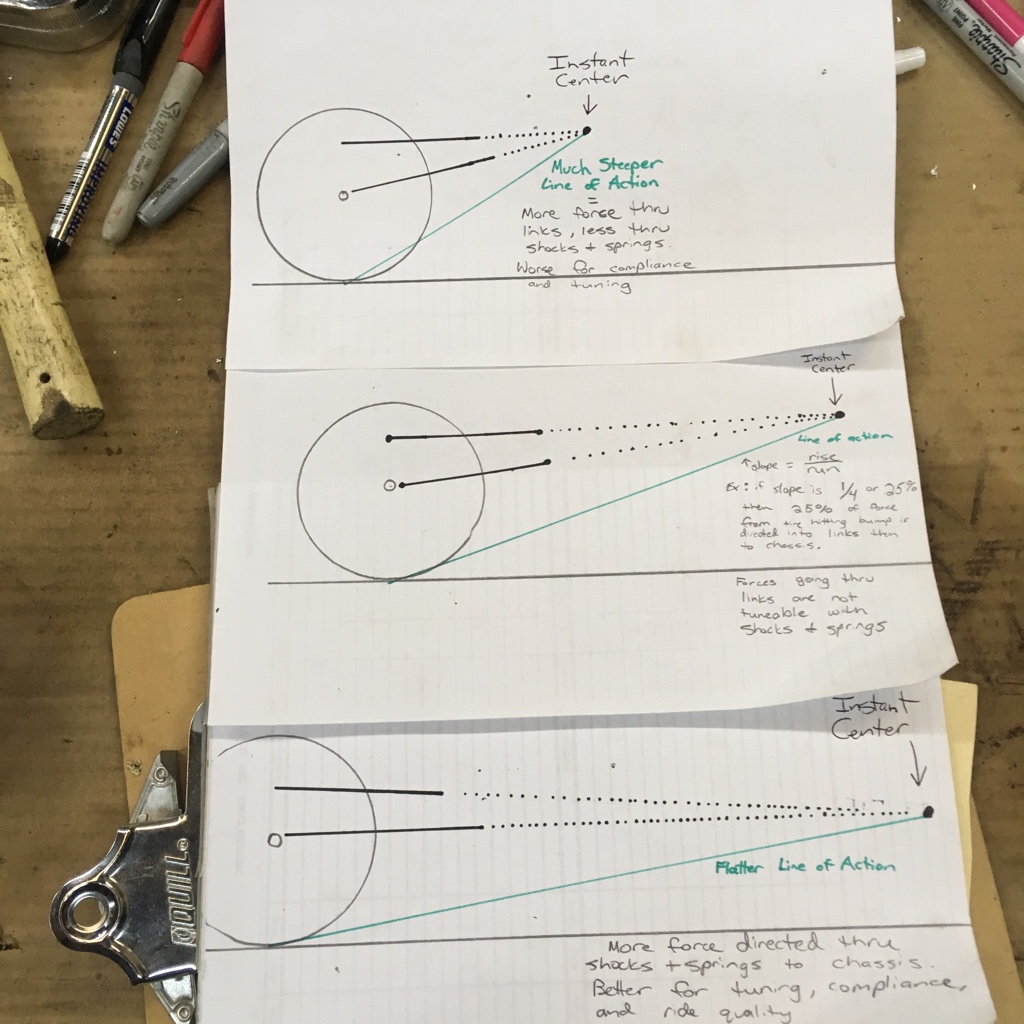
That's mostly accurate. Yes what I call the line of action, is also the Antisquat line.
When I think of side view instant center, Im just looking at where the IC is hortizontally, in front of the rear axle.
When I think of Antisquat, Im looking at the height of the IC from the ground, and where the line of action (antisquat line) cross a specific vertical line. This specific vertical line represents the torque/traction split front vs rear.
If the line of action, cross the torque/traction vertical line, at the COG height, That will represent 100% AS.
The AS percentage changes base on torque/traction F/R, but the slope of the line of action does not change. This is why any specifc AS value is less important, but must consider the other variables.
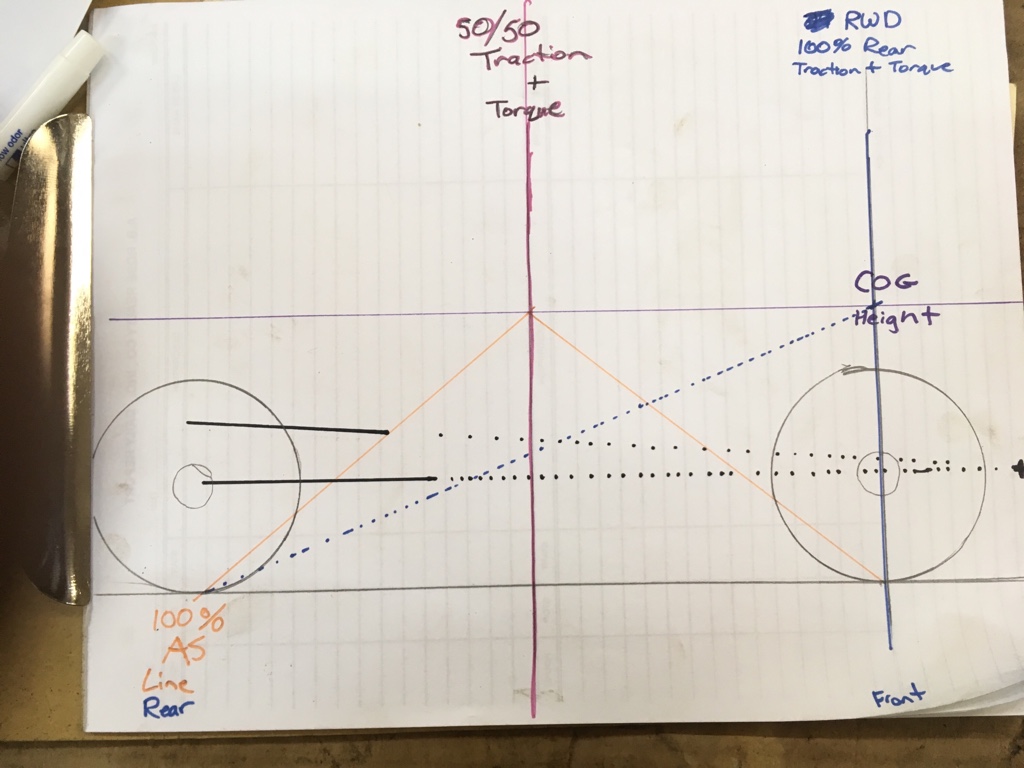
That image doesn't account for traction split front vs rear.
If you are on flat ground and in 4wd, with 50/50 torque and traction split,
The 100% antisquat line moves rearward by 50% the wheelbase.
The orange line represents the 100% AS line, for 50/50 torque/traction split.
The blue dotted line represents the 100% AS line for 100% rear torque/traction.
The older 4link calculator, and most engineering books use this model and formula.
Whatever the split for front/ rear torque or traction split, moves the vertical lines front or rear, illustrated by the blue or the pink vertical lines.
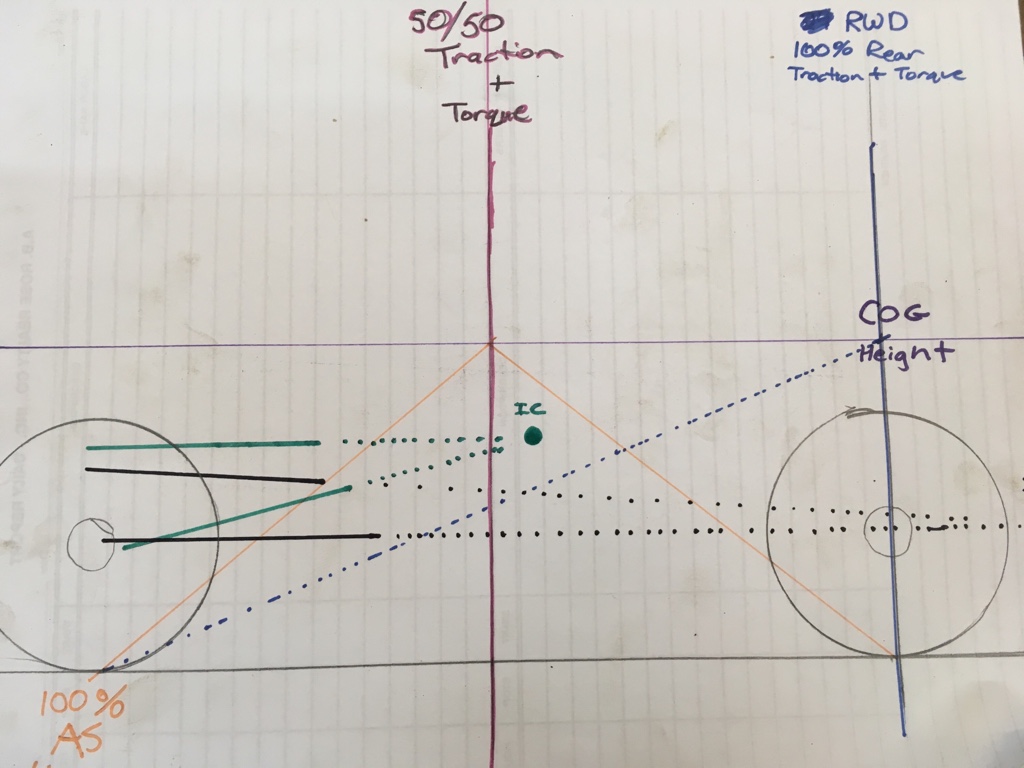
Now, where it begins to get clear as mud:
Depending on link location, you could have over 100% AS while in 2wd, yet 75% antisquat while in 4wd on flat ground.
This would move your instant center to between the orange and blue dotted line. This is shown below with the green lines and green IC.
Another complication to consider:
When going uphill, on 45% degree obstacle,
50% of the sprung weight is now on the links and not the springs.
This is because the vehicle pitch is 45% yet gravity direction remains constant.
This moves your suspension position towards droop.
As well, you are moving towards 75% rear torque/traction, and 25% front.
Now you want to consider your link locations at droop, with differing torque/ traction splits.
Sorry for the hijack again Dave.