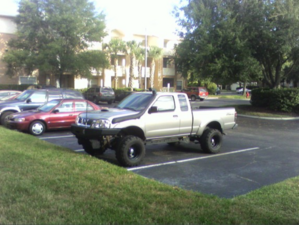
Battleship: 2001 Nissan Frontier

OnlyOneDR

Well-Known Member
Joined
Feb 10, 2006
Location
R
3+ years in the making. Truck is at 95%. This is kind of an anti-build thread since most of the work is done. I will cross-post a thread with actual buildup pictures: http://www.noas4x4club.com/forum/viewtopic.php?f=32&t=6132 and I will post updates as I finish her up.

ai233.photobucket.com_albums_ee179_trustonlyme_Frontier_20Project_0DSC06277.jpg


ai233.photobucket.com_albums_ee179_trustonlyme_Frontier_20Project_0DSC06275.jpg


ai233.photobucket.com_albums_ee179_trustonlyme_WindRock_20September_202014_0DSC06314.jpg


Specs:

Axles-
Front: High Pinion D60, 4.10s, ARB, Reid Cs, Chromo Inners, Spicers, AxleTech Portals, Wilwood Disc brakes.
Rear: 14B with Ballistic Shave, 4.10s, Detroit, pinion guard, AxleTech Portals, Wilwood disc brakes.

Driveline-
Rear: Custom SYE, 1350 jointed slip-shaft, transfer case disc parking brake.
Front: New slip-shaft with 1310 CV at transfer case, 1310 yoke on D60. Aluminum Nissan-Spicer adapter.
Transmission: Nissan D21 internals with 4.05:1 first gear swapped into D22 transmission case.
Transfer Case: Nissan TX-10A with Calmini 3.92:1 low-range.

Suspension-
Front:
3-link with Ballistic 3.0 Forged joints, 2.25" DOM links, Trackbar, 12" ORI STX Struts w/piggyback reservoirs
Bolt-on removable strut towers and strut tower brace
Rear: Spring-under with my 3" Alcan lift springs (rejuvenated by Alcan), Revolver shackles, 16" Fox 2.0 Air Shocks and custom in-wheelwell towers, Ruffstuff Traction bar. Front Spring hangers heavily gusseted.

Steering-
Forward-facing steering box ('78 F-150), ported for ram assist, flat pitman arm.
1.5" bore 9" stroke AGR ram
TC pump and remote reservoir
ORD 5-hole flat steering arms, ARP studs.

Wheels/Tires-
37x12.50R17 Maxxis Trepador Radials on Stazworks 17x10 Pattern "20" wheels w/8" BS

Body Mods-
1" Body lift for steering box and transfer case brake clearance
Replacement Bed trimmed for bumper clearance

Armor-
Sleeved frame for existing Shrockworks sliders, added gussets to slider mounts.
New belly skidplate UHMW Poly
Shrockworks fuel tank skid for Xterra modified for Frontier
Custom front and rear bumpers
Custom swing out tire carrier

Misc-
5-gallon air tank under bed
On board air with ARB compressor
Rear battery
Front M8274 winch w/contactor and in-cab controls
Rear M8000 winch w/contactor
Ford SuperDuty master cylinder, ABS deleted
Raised fuel tank 1"

Dimensions:

Weight: ~6100#
Height: 78"
Width: 80"
Height under axles (street pressure):16" front, 17" rear
Height under link mounts: 19"
Height under belly skids: 21"
 
Last edited:
Cool stuff, it already got mentioned in the newest Petersen's 4Wheel & Offroad in an article about the WENT Windrock Nissan run in September! A decent picture and caption.
 
Are you the same guy that was on 4x4parts back about 6-8 years ago that did the 4x4 conversion on a Desert Runner? I think I got a lot of info from you when I did my swap around that time before mine got stolen.
 
Are you the same guy that was on 4x4parts back about 6-8 years ago that did the 4x4 conversion on a Desert Runner? I think I got a lot of info from you when I did my swap around that time before mine got stolen.

That would be me or possibly Houdini. I converted it in late 2003 and started wheeling it in mid-2004. We did his crew cab conversion in 2006. They have both grown up quite a bit in the last decade!
 
I remember your name.. I was down in Florida with Gator and Black Pearl. This was mine right after the conversion (~2006ish) about 2 years before it was stolen and demolished.
 

Attachments

  • Screen Shot 2014-12-10 at 8.56.37 AM.png
    Screen Shot 2014-12-10 at 8.56.37 AM.png
    3.8 MB · Views: 479
Painting the bed:

This one I left to a professional. A friend of one of my college buddies has a body shop and gave me a great deal on spraying the bed to match with color and clear. Used the same PPG color but it's off just slightly. No worries though, it looks so good I think it makes the front of the truck look terrible! I had purchased a new pair of front flares and went ahead and had them painted with everything else but I put them away instead of installing them on the truck.

ai233.photobucket.com_albums_ee179_trustonlyme_Frontier_20Project_0DSC06397.jpg

ai233.photobucket.com_albums_ee179_trustonlyme_Frontier_20Project_0DSC06398.jpg

ai233.photobucket.com_albums_ee179_trustonlyme_Frontier_20Project_0DSC06399.jpg

ai233.photobucket.com_albums_ee179_trustonlyme_Frontier_20Project_0DSC06400.jpg
 
Rear Air Shocks:

I killed the Rancho 5112 shocks I had on the rear in three wheeling trips. The rear sitting too low, not enough up travel and bump stops in the wrong position all conspired against them. They were ready to go regardless. I cut off the lower shock tabs I had welded on previously, slipped the shocks off the upper mounts, and proceeded to build new shock towers for the 16" Fox 2.0 Air Shocks. These will allow me to charge up the shocks to get the rear boosted up to where it should be regardless of how much load is in the bed. This will be especially handy when I add the auxiliary fuel tank.

Parts for Rear Shock Towers:


Tacked Up and Clamped Up:


ai233.photobucket.com_albums_ee179_trustonlyme_Frontier_20Project_0DSC06385.jpg

ai233.photobucket.com_albums_ee179_trustonlyme_Frontier_20Project_0DSC06387.jpg

Sleeving Frame:

ai233.photobucket.com_albums_ee179_trustonlyme_Frontier_20Project_0DSC06389.jpg

Axle Tabs Welded to Portal Mounting Plates:

ai233.photobucket.com_albums_ee179_trustonlyme_Frontier_20Proj2750e00b692c35dc6ef3c3767bacb3ba.jpg
 
I really hated the heim joint at the axle end of the drag link. It allowed the drag link to twist more than it should have, elevated the link a little higher than I would have liked, and I did not build the mount strong enough for my expectations. So, I cut the mount off the tie-rod, cut the tube end off the drag link, and proceeded to change it. I bought a piece of 7/8" cold-roll stock, drilled and reamed for a one-ton GM drag link end (DLE), then welded in a tube insert on the drag link. This has the added benefit of additional adjustment of the drag link since heims in this size have fairly short shanks when compared to a DLE.

Painted up:

ai233.photobucket.com_albums_ee179_trustonlyme_Frontier_20Project_0DSC06374.jpg

Steering Links Re-Installed:

ai233.photobucket.com_albums_ee179_trustonlyme_Frontier_20Project_0DSC06375.jpg

Drag Link End Replaced Heim Joint Here:

ai233.photobucket.com_albums_ee179_trustonlyme_Frontier_20Project_0DSC06376.jpg
 
Why not bob the bed?

Also I'm sure you know, but you'll need a nitrogen supply to adjust the shocks on the fly with load

Originally I was going to bob the rear but this is not just a "trailer to the park" kind of rig, I use it for longer overlanding trips as well. I realized that the lack of space would be missed more than hanging up every once in a while from a lower departure angle. The truck is 12" higher than it used to be so I don't have nearly as much issue with that now. So instead I cut off the bottom of the rear quarters, rolled a lip, then built that wrap around bumper.

I already have a Nitrogen rig for adjusting the front ORI struts. Last night I charged the Fox shocks up to 140psi with 6" of shaft showing and the rear popped up a little bit already. I have to get it loaded for an upcoming trip then charge them up some more.
 
So I wanted a transfer tank to put in the bed. None of the fuel cells or tanks would fit the space I intended for it so I had one made. Started with this drawing a few weeks ago:

ai233.photobucket.com_albums_ee179_trustonlyme_Frontier_20Project_20150406_225906.jpg

And this tank showed up today:

ai233.photobucket.com_albums_ee179_trustonlyme_Frontier_20Project_0DSC06412.jpg

It goes here:

ai233.photobucket.com_albums_ee179_trustonlyme_Frontier_20Project_0DSC06416.jpg

Under the tonneau cover canister:

ai233.photobucket.com_albums_ee179_trustonlyme_Frontier_20Project_0DSC06418.jpg

Time to get it all plumbed up. It is going to be set up with a pump, filter, and nozzle so I can re-fill my stock tank or pump into someone else's if need be.
 
Transfer Tank Pump System

I bought a 140GPH pump from Summit Racing as well as a cartridge type fuel filter. Installed those on a shelf above the tank using the bed organizer as the base. Used a toggle switch with a safety cover mounted to the far right side of the bed so I can reach in and run the pump from outside the truck. Installed about 8' of fuel hose with a ball valve and a brass 4" pipe (with a screw cap when not in use) as a nozzle. It works well, not sure how fast it flows over all but I can empty the tank in maybe 8 minutes or so. The hose is long enough to reach other vehicles' fuel fillers when parked within a couple feet of my truck. Used it already on its first trip out when some folks ran low on fuel (long back-road travel day).

ai233.photobucket.com_albums_ee179_trustonlyme_Frontier_20Project_0DSC06689.jpg
 
In-Bed Hi-Lift Mount

I wanted to be able to carry my 60" Hi-Lift jack with me at all times since I cannot use normal floor jacks with the truck anymore since it is so high. I made a special bracket to bolt to the underside of the bed rail lip and through the top of the passenger wheel well. Using the Hi-Lift Loc-Rac mounts bolted to my bracket and the rear corner of the bed I am able to carry the Hi-Lift in the bed but secure and out of the way.

Custom Bracket

ai233.photobucket.com_albums_ee179_trustonlyme_Frontier_20Project_0DSC06425.jpg

Front Loc-Rac Bracket

ai233.photobucket.com_albums_ee179_trustonlyme_Frontier_20Project_0DSC06680.jpg

Rear Loc-Rac Bracket

ai233.photobucket.com_albums_ee179_trustonlyme_Frontier_20Project_0DSC06682.jpg

Installed

ai233.photobucket.com_albums_ee179_trustonlyme_Frontier_20Project_0DSC06690.jpg
 
Bed Lighting

As is typical with any truck, it never hurts to have more light in the bed at night. So, I bought a coil of waterproof strip LED and installed it down the underside of my roll top bed cover track. The switch is mounted in the bed liner behind the Hi-Lift (you can see the switch to the left in the rear bracket picture in the last post). The lights are powered by the rear winch battery.

Overall effect (taken at night in the garage with all the lights off):

ai233.photobucket.com_albums_ee179_trustonlyme_Frontier_20Project_0DSC06686.jpg

Each side:

ai233.photobucket.com_albums_ee179_trustonlyme_Frontier_20Project_0DSC06687.jpg

ai233.photobucket.com_albums_ee179_trustonlyme_Frontier_20Project_0DSC06688.jpg
 
Really neat idea. Like it.
 
Headliner Replacement, Dynamat, and Grab Handle

My headliner started falling down a few months ago and completely let loose on my last trip. I pulled out all the interior plastic around the pillars and removed and cleaned the headliner pressboard. I had Auto Interior & Tops in Raleigh, NC recover the headliner and also recover the sun visors since the foam-backed fabric had let loose on those as well. The end result looks like it did from the factory (without any of the original warning labels on the visors, of course). While I had it all apart I cut holes to install a grab handle on the roof of the driver's side. The cab was made with threaded screw holes to accept the handles but the headliner was not drilled for it and of course I needed to acquire an extra handle to match.

As a part of this project I bought Dynamat Xtreme and covered the roof and the rear of the cab. The "tinny" sound of the roof is gone, thankfully.

ai233.photobucket.com_albums_ee179_trustonlyme_Frontier_20Project_0DSC06692.jpg

ai233.photobucket.com_albums_ee179_trustonlyme_Frontier_20Project_0DSC06696.jpg

Headliner ready to install:

ai233.photobucket.com_albums_ee179_trustonlyme_Frontier_20Project_0DSC06694.jpg

Installed (and you can see the new grab handle):

ai233.photobucket.com_albums_ee179_trustonlyme_Frontier_20Project_0DSC06695.jpg
 
Back
Top