Granny
One day at a time...
- Joined
- Jun 12, 2007
- Location
- Cabarrus County (Rimertown)
No beer bugs... had surgery a couple weeks ago. Had some complications. Confined to the recliner & TV for a little while. Seem to be doing better now.


")


I know you want to keep it simple, but a lift arm with multiple height settings, similar to deck height, would make it nice for multiple activities vs all up/downDon has the incentive... the Doc says NO!... period! Next appointment on 28th... maybe he will turn me loose then. However, I am listening to him carefully. I have had my fill of complications! Doing fine now!
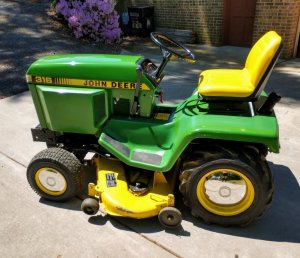
Anyway, I have not touched this thing since last post. To keep up with Rodney I walked out to the garage this morning and took pics of what has been sitting there waiting. One day I will finish it. By the way Rodney, your works looks good, and as an extra, I could not help but notice the extremely nice shoes shown in your 3rd photo!
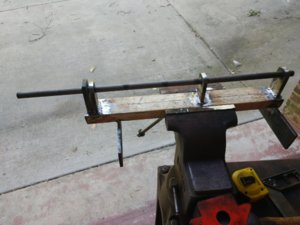
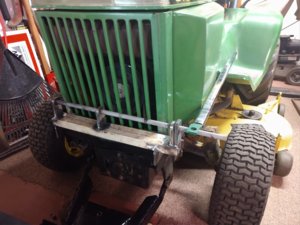
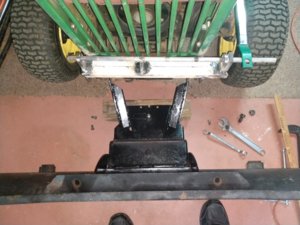
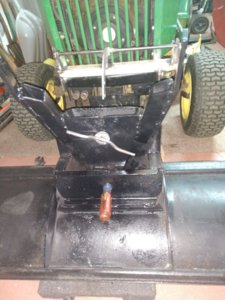
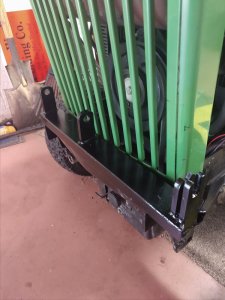
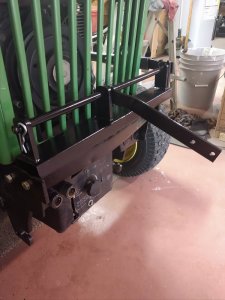
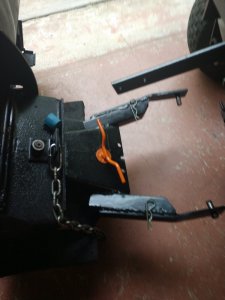
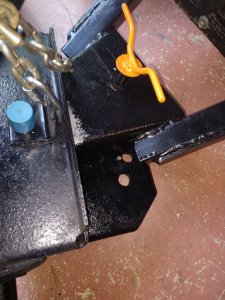
The pics below show the whole works except for a lift handle. The possibility still exists that the mower deck control handle might be used to control the blade, but I am also considering keeping the two separate as I could use the mower for grinding leaves and not have to remove the blade. And... I am thinking at times the blade could come in handy during the leaf roundup. More thought needed on that one. I think the pics are pretty much self explanatory. You may note the lift mechanism can put a little bit of down pressure on the blade. More when I can get at it.
View attachment 316262 View attachment 316263 View attachment 316264 View attachment 316265
I know you want to keep it simple, but a lift arm with multiple height settings, similar to deck height, would make it nice for multiple activities vs all up/down
 . Oh and I can relate for the record!
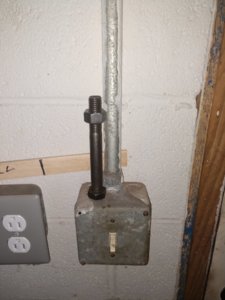
Maybe Check by the light switch old man

@Granny have you thought abut using heims instead of bolts and thru holes, would give the push blade a little bit of articulation ability n uneven ground...Just a thought.


Thank you! And... I appreciate the gift, plus the effort you made toward getting the thing transported to me. Presently working on the deck... it is in rough shape, but I believe I can save it. Had to replace both blade spindles, and weld up many cracks in the metal. If it blows leaves into those plastic containers I will be delighted!!!That looks great. I’m glad someone is using it.


I don't have a convenient spot to place a handle, as you have. Too much Body & Flaring, that I'm not sacrificing.
Nice set up Don! I see what you did. I just did it a different way, & have my handle attached directly to the pivot arm. But, I'm not getting enough travel. On down setting, I'm pretty much level, & in lifting it, I can only get 2-3 inches. Too much stroke for the handle. I'd Like for it to drop a couple inches or more, before level, but then I'd never be able to lift it! I'll be changing something, just don't know what yet. I don't have a convenient spot to place a handle, as you have. Too much Body & Flaring, that I'm not sacrificing.
I was Wishing for something Splined, when setting it up, so I could adjust it, but didn't have anything. Tacked it twice, & thinking ok, it's good. Weld it up, & No. Dab-Nab-it!The travel is all about the length of the arms on your pivots. You can increase the travel by shortening the lever closer to the handle or lengthening the lever closer to the blade. It is a little more complicated since you likely have 3 levers atleast.
 I got plenty of time to ponder it!
I was Wishing for something Splined, when setting it up, so I could adjust it, but didn't have anything. Tacked it twice, & thinking ok, it's good. Weld it up, & No. Dab-Nab-it!
I'd say the arm that attaches by chain, to the blade, is fine. Handle is attached directly to the pivot. So, I don't have enough travel through the handle, by arms reach, from the seat. I'll probably have to do more like Don's handle.What is your limiting factor? The handle or one of the pivots?
I'd say the arm that attaches by chain, to the blade, is fine. Handle is attached directly to the pivot. So, I don't have enough travel through the handle, by arms reach, from the seat. I'll probably have to do more like Don's handle.