Legends Class 4800 Build - “Tinkerita”

All looks great, best suggestion I can offer is after you install fittings, fluid systems etc have a friend go behind you and double check all connectors and fittings and have them mark each one. It will help when you get to the end and start firing things up, bleeding systems etc. Same thing with nuts. You tighten and than have someone else go behind you check and mark.
HAHA! You volunteering?

It's funny you said that, because I've been marking everything in white as I tighten and torque things down. I also ordered other colors (pink & blue) to have others do exactly what you suggested. Great minds think alike. Should be a rolling chassis within the next few days and then I'll dive into our LS1/TH400.

Thanks for the ideas.
 
After the last post, I've spent a lot of time in the garage getting this thing back together. Unfortunately I'm not as far a long as I wanted, but when do we ever get everything done we want in time ha! I did however get the front and rear brake assemblies installed on the axles, aligned the axles with the chassis, and rolled the chassis out of the garage for the first time ever. Was an exciting day.
Rear Brake Assembly.jpg


Front Axle Install.jpg


Front Axle Brakes.jpg


Rolling Chassis Initial.jpg


Roller Outside Side.jpg


Roller Outside.jpg


One of the reasons I'm reassembling the chassis backwards from the original build, is to complete the rear before moving to the front. With that said, in order to finish the rear, I need to install the fuel cell, radiator, etc. So I started tearing down the used Jaz fuel cell. The main reason was 1. install our dual pumps inside the tank versus a single pickup at the bottom, 2. verify the foam is in good shape, and 3. knock out the big dent on the bottom which caused it to not sit flat in the mount. Although not a Holley dual pump system, I used some redneck ingenuity to make something work without paying $$$. After getting everything back together, I was able to get it all installed in the chassis.
Fuel Cell Dual Pump Install.jpg


Fuel Cell Pump Installed.jpg


Fuel Cell Assembled.jpg


Fuel Cell Installed.jpg
 
FDAB39E4-F195-475F-AB33-0F6F2405A153.jpeg


I like different colors to note different cycles.

One color is for prep before lakebed at home, 2nd color is for pre race inspection on lakebed.

Could do third color or different style mark for pit crew on lakebed, but that’s usually too much to ask 🤣…. It’s good enough to get someone to check/tighten and remark with whatever is nearby.

I’ve just found this stuff to be better than paint pens as it’s more wax like once dry and is easy to spot if it loosens bc it shows a crack
 
Last edited:
Well the past week has been somewhat disappointing to say the least. My hopes were to get the motor rebuilt and installed this past weekend, however that was not the case. After disassembly, I found a spun bearing on cylinder #6 rod, which destroyed the rod but didn't hurt the crank which I'm thankful for. Also, found that the cam bearings were toast as well, which I wasn't planning on replacing. With all of that said, there were some unexpected purchases that I had to make. Not a big deal, just more of a set back on time. Regardless, we got the LS1 disassembled, every part cleaned, inspected, painted the block, and began installing the upgrades.
LS1 Disassemble.jpg


LS1 Clean Up.jpg


LS1 Paint Prep.jpg


LS1 Final Clean.jpg


Since the LS1 heads had perimeter style valve covers, I decided to use my 5.3 heads instead on the rebuild which will increase compression a little. I had to completely disassemble and clean the heads to get them ready for rebuild. Oven cleaner is by far the best cleaner I found to work on this, just an FYI. After getting the castings clean, I cleaned each valve, and lapped each valve in the clean head. While working on the heads, I also installed a trunnion kit on the rocker arms and installed new seals while I was there.
LS1 Head Cleaning.jpg


LS1 Valve Lapping and New Seals.jpg


LS1 Trunion Upgrade.jpg


Knowing I was awaiting a new rod, I decided to start reassembly without having everything I needed. I knew I could at least get one side completed, so I began replacing the cam bearings. After borrowing the needed tool, this was an easy install, even with the crank still installed. After getting the new bearings installed, I started the longer process of installing what pistons, meanwhile checking bearing clearances and honing cylinder walls. After getting everything installed, I installed our new mild stage 2 cam with new timing chain and oil pump (left un-torqued so I can add a dampener). This allowed me to install my new lifters and treys before installing the newly built head. To finish it all off, I installed our new chromoly push rods and our newly built rocker arm assemblies. When the new rod arrives, I'll be finishing the the other side, but for now I threw a bag over it to keep everything clean.
LS1 Rebuild.jpg


LS1 Odd Bank.jpg


Although a little behind on the LS1 rebuild, some goodies did arrive which kept me sane...
TH400 Parts.jpg
 
Well, since I was at a standstill on the LS1 rebuild, I took all my newly acquired TH400 goodies to a buddies shop. I don't know much about transmissions, but I wanted to learn for future reference, so I reached out for some guidance. Luckily Justin with Digging Deeper knows a thing or two about TH400, and was willing to help me out. Saved me a lot of headache researching and watching the YouTube on "how to's" ha.

At first a little overwhelmed by all the internals, after we began to reassemble everything in the new ATI SuperCase, it's wasn't as difficult as I made it out to be in my head. Also installing a manual valve body added to the simplicity of the rebuild as well. With just a few hiccups, we got the newly build TH400 completed and I was on my way back home.
TH400 Disasseble.jpg


TH400 Rebuild.jpg


TH400 ATI Case.jpg


Once I got reestablished at home, there were a few other things I needed to install. With the new case, I installed a new chromoly output shaft which I needed to cut to length. Installed both the bellhousing and tail housing plate, pan filter and finish it off with a new pump seal. After that, literally threw it into the chassis to make sure the new deep pan would fit. (FYI I did go back and trim the front fins for clearance to the chassis)
TH400 Finished.jpg


TH400 Installed.jpg


Since I was still awaiting parts for the LS1, I started the disassembly of my old D300. Originally in my old crawler, I was going to use my old internals to build our Behemoth D300 case with upgraded 32 spline outputs. I chose the D300 for a few reasons. 1. gear driven design versus chain, and weight versus 205 2. commonality of the D300, (the ease of rebuilds, parts, etc.) I'd be able to find one just about anywhere 3. cheaper than aftermarket, least in theory. Since I was already familiar with Behemoth Drivetrain, used their original D300 flip kit, I reached out to them in the beginning for their new Colossus D300 Case. They were generous enough to help us out and even added a little etching specifically for us. I also like their design versus Midnight Metals due to the integrated cable shifter design. With the new management, they redesigned this in the new cases where over shifting isn't possible, a nice upgrade from the original design. Within a few hours of work, I got the old D300 disassembled and the new Colossus D300 rebuilt and installed with the transmission.
D300 Old.jpg


D300 Rebuild.jpg


D300 Output Shaft.jpg


D300 Completed.jpg


D300 Install.jpg


Luckily, within the few days of me completing the D300 and getting it mated with the TH400, our LS parts showed up. It was time to finish what I originally started. Before I jumped back in, I did take a day off to relax and spend time with the wife. She's ready for this project to be over haha.
 
Although not exactly how I had planned, we never stopped progress on Tinkerita's rebuild. For that, I'm thankful because KOH is just right around the corner!

With everything that I needed to finally complete the LS1 rebuild, I tried to knock it out as quickly as I could while double checking everything along the way. First, was to install the piston on the new rod and check bearing clearances before installing. Not an easy task with an old dirty push pin... but nothing a little heat and press couldn't handle. After installing the #6 piston and torqueing everything to spec, I installed the rebuilt head and torqued it down. Moved from there to finish up installing the timing chain dampener, new oil pump, double bolt pick up tube bracket, and finished with front cover with a new seal. After that, I worked on the rear cover area by installing a new barbell, rear main seal, and capped it all off with the freshly painted oil pan and gasket. To complete the build, I splurged a little and installed ATI's dampener for the longevity of the crank.
LS1 Head Install.jpg


LS1 Oil Pump.jpg


LS1 Rebuild Finished.jpg


Now I'm no engine builder, so a lot of prayers, panics, and fear went into this before getting this thing installed into the chassis for hopefully the last time. Since it gets dark at 5pm, I figured it'd be best if I turned the chassis around so I could utilize what light I have for the install. With a few good pushes, I got it turned around and the engine hoist out for the LS1 install. The last thing to do before easing it into the chassis was to install the flex plate. After that I lowered it into its place only to fight it a little before the bolt holes lined up, which meant I had to move the TH400 back out of the way. All in all, we got it installed.
LS1 Final Install.jpg


LS1 Installed.jpg


With my excitement, I was eager to start throwing parts at it, however I knew I needed to focus on getting everything bolt up behind it first. I started with the TH400 by installing our prefilled converter, checking clearances, and bolting everything up to spec. I did have to add 1/4" to the overall mount on the TH400 which meant I needed to add the 1/4" to the D300 mount as well. After a day of refabricating the brackets, I got them painted and finally got both the TH400 and D300 in their final resting place with the LS1 installed.
LS1 TH400 Install.jpg


With that all done, I could finally get the LS1 complete and ready. I started with the easy stuff first, intake, coil brackets, etc. before working on the rotating assembly. Luckily this time I was loctiting everything and torqueing it all to spec. The only setback I had was the starter. I ordered the wrong one, but luckily I caught it early enough that I was able to get another one ordered without having to wait again.
LS1 Intake & Coils.jpg


LS1 Rotating Assembly.jpg


The only thing left is to get the correct length belt and a new alt but still figuring out overall amps. Which leads me into the next build phase... wiring everything up. Again, I'm not a lot of things, but I'm definitely NOT an electrician. This is the portion of the build that I have been dreading and will take the most time for me to figure out. Hopefully with the help of the Holley and Switch Pros, everything will be easier than expected.
 
Happy New Year's everyone. I hope you all had a wonderful Holiday Season and were able to spend some quality time with family and friends while being able to sneak out into the garage or shops or maybe out on the trails.

I was lucky enough to have time off from my 8-5 and really focus on the build over the last couple of weeks. With the freshly built LS1 installed, started tackling the electrical portion of the build. Since I had the most free time to focus on this, I wanted to make sure everything was done correctly, starting from the batteries to the kill switch to the Holley system to the Switch Pros. I calculated everything from watts and amps being used to wire gauge versus lengths needed. To say the least, my head hurt but I'm glad I went through the hassle in advance. Wiring.jpg

After getting everything out and ready, I started laying out the Holley harness and figuring out routing to the ECM. It really was a plug and play process as I went ahead and bought new sensors for the engine so I had the correct ones for the harness. The only change I made was to the fuel pressure sensor. I moved it to the back firewall versus up on the fuel rail since this is where the regulator is. After figuring out placements on everything, I started installing the Switch Pros panel and touch pad. With a few small brackets, I was able to keep everything in one central location. Although a lot of wires, after going through it all and programming the switches, it all worked out perfectly. No relays, fuses, etc. to worry about now. I even took the time to label everything.
Holley Harness.jpg


Switch Pro Mount.jpg


Switch Pro Labeling.jpg


Dash Finalize.jpg


After getting everything initially in place, I spent a couple of days focusing on programming my switch outputs and initial tuning of the motor. With the install of a new starter, wiring to the fuel pumps, priming of the oil pump, and an oil fill, I was ready for the first fire up. It was a super cold morning, but I figured now was a better time than never. With a couple of quick clicks to establish oil pressure, the LS1 fired right up. All I can say is WOW, a huge sigh of relief when is idled and no bang bang noises. She's alive and healthy!
Dash Switch Pro & Holley.jpg


After that, I spent the next couple of days finishing up all the wiring for everything. Headlights, dome lights, radiator fans with trigger switches, brake lights, horns, etc. you name it, I wired it. After getting some help from a buddy, I finished off everything with some wire loom, from front to back, every wire is protected in some way shape or form, weather proofed, and heat shrunk.
Wiring Chase Bar.jpg


Wiring Rear.jpg


Wiring Brake Lights.jpg


Although not as far a long as I want to be, we made huge progress over the break. Now back to reality... but Tinkerita's alive and that's all that matters.
 
After getting the wiring all finished up, I notched and trimmed the dash and firewall areas to accept the new wiring. To make some quick progress, I worked on installing the rear tire carrier, rear panels, and got measurements/ideas for our oil coolers. Then jumped to the front to finalize the grill and bull bar. I even spent 3 days trying to find the correct serpentine belt. Basically procrastinating on the big components that I should of focused on.
Dash Front Panel.jpg


Rear Tire Install.jpg


Front Grill Prime.jpg


Front Grill Finished.jpg


LS1 Belt Install.jpg


With all of this progress, it was a cover up for all the failures and setbacks that occurred during this time as well. To date, I still haven't finalized coolant lines on the chassis. I've changed my overall design at least 3 times. Still not what I want, so currently thinking about how to run them efficiently. The front axle... that's been a long drawn out process. What should of been a day or two to finalize the 3rd member turned into two weeks awaiting bearings, only to find out my inner shafts were too long and the upper link didn't have enough clearance at full bump with the pinion support. Which after digging into the bump situation, I found that my shocks bottomed out before the bump stops which is bad. I used the original flat retainer plates versus the raised plates and well I'm having to change bump pads to accommodate. I've been able to work through some of these issues, it's just more delays on Tinkerita's completion date.

With all of that said and with a heavy heart, I pulled my registration from KOH 23. There's been multiple reasons for this, but time and resources were a big part. With only a few weeks before racing starts, I decided it wasn't worth all stresses that come with racing KOH. If you know what I mean, you know... if not its a logistical nightmare from NC to CA, team travels (aka their sacrifice and money), testing and tuning an untested race car, just to name a few things, there's so much more to consider. To keep my sanity and to keep the wife happy, we decided to just race in April at Rush and go from there.

So, my time in the garage hasn't been as stressful I will admit since the decision, but we're still making progress. As of late I have been going back through the front and getting everything corrected so we can check it off the list. Should be able to finalize carrier bearing placement and get the front driveshaft and midshaft all completed this week.
HP10 Build.jpg


HP10 Complete.jpg


HP10 Install.jpg


HP10 Bump.jpg


Driveshaft Front Build.jpg
 
I took a few weeks before KOH away from the garage to just regroup and just enjoy the KOH events. Now that KOH is over, I've had some motivation to get back on Tinkerita. As most of you know, My front axle shafts were too long due to some incorrect measurements that I took with the SD unit bearings. I've got it all figured out now, I just need to get them shipped off to Brandon at Branik for them to fix them. It's also the same for the rears so they'll go too.
40 spline axles.jpg

40 spline axle too long.jpg


From the video update, I also made progress on the coolant lines as well as the front drivelines. The coolant lines are all but complete now minus some hose clamp mounts that I need to fab up and install. I wish I would have pre-determined the coolant lines while building the chassis so I could of added fittings within the chassis for the coolant to run through, however we got the external lines all figured out. Only issue that I might have is the heat from the headers on the return line. I have some ideas to help though.
Coolant Lines.jpg
Coolant Line Supply.jpg
Coolant Lines Front.jpg


Since I was already working on the front axle and third member, I continued with the front drivelines. The biggest issue on this was arranging the carrier bearing in a location to not bind any u-joint and allow the front driveshaft enough clearance with the motor mounts. After a couple of days of cutting and repositioning everything, we got it all tacked in place, ready for a full weld. I also was able to cut and fabricate a smaller slip yoke with the parts I had on the shelf to make a small mid shaft. After some small adjustments and alignments (phasing), I'll be able to weld up the front and mid shaft as well.
Driveshaft Carrier brg.jpg
Driveshaft Front Install.jpg
Driveshaft Front Clearance.jpg
Driveshaft Mid Shaft Install.jpg


After a few days in the garage, I've officially made the last order of supplies and parts to get Tinkerita drivable! I assume I'll be getting these things over the next week and I'll hopefully be making some big steps in the right direction. The Rush race is just right around the corner so the push is on.
 
After the last update, I turned Tinkerita around to work on some rear components. This involved reinstalling everything on the front suspension that way I could roll it around. After a little bit of struggling, I got it turned around and backed back into the garage. The front profile is a nice motivation to get this thing done!
Profile Update.jpg


While awaiting some of the components that I ordered, I decided it was time to start my final to do list. I broke everything down by systems that way I wouldn't forget anything. From welding brackets to minute fluid checks, the list was a little longer than I anticipated. So I figured I'd work on the main components to get this thing drivable first, then worry about racing stuff afterwards. Right now my main focus is a little bit of seat time before we head up to Rush.

With that said, I started with the transmission and transfer case. I wanted to get these things 100% ready since they are important pieces to the puzzle. For the TH400, I needed to install the reverse pattern plate on my shifter, and get the shifter cable installed. I also needed to work on the trans cooler and lines which included fabricating some type of mount for both the trans cooler and oil cooler. Since I ordered massive Griffin coolers, they required a large amount of real-estate. Unfortunately, about the only place I could put them was in the rear behind the radiator. In the future, I might move them where the batteries are, but that'll require moving the fuel cell as well, so I'm not 100% sure yet. But for now, I'll make this work. The main issue was having access to the fuel filter/lines and the radiator fans. So I made a mount system that is easily removable and can pivot as well to have quick access.
Shifter Reverse Pattern.jpg
Shifter TH400.jpg
Cooler Mockup.jpg
Cooler Mount.jpg
Cooler Layout 2.jpg
Cooler Install.jpg


As for the transfer case. I needed to install the yokes, fab a speedo cap, and get the shifters figured out. Since I previously figured out the mid-shaft, I was able to keep the yokes the same and get another one ordered. This is nice for spare parts in the future. As for the cap, I simply used 3/16" aluminum plate and cut it out. The most time consuming part about this portion was the shifters. I had to lengthen the overall shifter mount due to cable throw, I had to shorten the overall shifters themselves since I moved them to the center console as well as having to bend them for comfort, and get my new JB Fab cables installed. While doing all of this, I also simplified the electrical system by installing a simple on-off switch versus the 1-both-2-off switch. Minimizes overall chassis wiring and keeps things simple.
Shifter D300.jpg
Shifter Install Update.jpg
Shifter D300 Cables.jpg


It was nice to knock out some big things on the list. The last things to finish them off are, vent lines, cooler lines (have to order few fittings), and of course fluids. All of which can be done relatively quickly. Although not 100% done, I'll take it as a win. I have a lot of 95% things done on this thing lol
 
Are you using both Griffin coolers for the trans ? Or engine oil for one ?

The location will be fine, plenty of people race with them in the same spot with good success.
 
Are you using both Griffin coolers for the trans ? Or engine oil for one ?

The location will be fine, plenty of people race with them in the same spot with good success.
Ones for oil... mainly capacity, and the other is for trans. As of right now, I'm not planning on wiring the oil fan right now. Just going to monitor temps. If I need to wire it in, I will but mainly focused on the trans temps. We shall see what happens.
 
Over the last couple of weeks, I've been knocking out as much as possible on the "to do list" to get Tinkerita finished up. I was able to knock out the rear coolant lines as well as route the trans cooler lines and the battery cables. Since they all run along the same side of the chassis, the zip tie tabs made a nice clean install for the electrical and cooler lines. For the coolant lines, I made my own tabs that allowed me to anchor them down with hose clamps. Overall, it's a clean neat install and everything clears the floor panels with no issues.
Coolant Lines Rad.jpg


Coolant Line Rear.jpg


Coolant Line Rear Install.jpg


Cable Shifter Install.jpg


I was also able to knock out the rear 3rd member. Running Nitro 5.14 10" gears with 40 spline spool, in a Strange case and GW pinion support. Went together pretty smoothly and installed it into the axle. Prior to building the 3rd member, I installed the case with the spool to get axle measurements since I knew my initial measurements were too long. Luckily, I'll be able to use 1 shaft, just needed to trim it up a bit. Got another one on rushed delivery so we shall see what happens. Regardless, after installing the 3rd member, I got the pinion guard installed as well as the one shaft and slug kit.
Rear Ring Gear Install.jpg


Rear Axle Shaft.jpg


Rear Axle Shaft Install.jpg


Since I technically have rear wheel drive, aside from gear oil leaking out the one open side if I drove it, I figured it was time to finish the drivelines. I removed the rear coilovers to get full bump and full droop measurements so I could build our last driveshaft. Just like the front, I used a digital angle finder to keep the driveshaft as straight as possible. Once it was ready to weld all of the driveshafts up, I called the wife into the garage to help me. She rotated each shaft as I welded, keeping it a single pass versus having to stop and start again. She also helped me paint them while I worked on welding up the carrier bearing mounts. After everything was painted, I spent the afternoon getting everything installed and torqued down. We officially have connected drivelines and the capabilities of moving it under her own power.
Driveshafts Painted.jpg


Driveshaft Carrier Install.jpg


Driveshaft Rear Install.jpg


Even threw a FSU sticker on the rear driveshaft to make it official haha. Now I know I've made a lot of progress, because the list is full of red lines, however there is still a lot to accomplish. I plan on taking some time away from work this week to really focus on finishing up the build. My goal of April 1st is right around the corner, but I'm also so close as well. Only time will tell!
 
There's been a lot going on over the past couple of weeks. To start, my goal of April 1st is quickly approaching, however I know we're super close. This past weekend, I had a "work day" scheduled at my buddies shop, which meant I needed to get Tinkerita loaded up and on the trailer. Was not an easy task as I needed to complete a few more things on the "to do list" and get her mostly assembled for travels. To start, I finished the front end steering and got everything torqued down and aligned. Also got axle shaft measurements that I needed and got those shipped off. I also worked on a few additional things like rear axle shafts, slug kits, and putting all of the panels back on while tightening a bunch of bolts.
Steering Ram Install.jpg


Steering Alignment.jpg


Profile P Side.jpg


My goal was to haul Tinkerita down Thursday afternoon and work on her Friday and Saturday. The hardest part in all of this was loading up all of the parts I still needed to finish up and take with me. Literally took me hours to get everything loaded up before hitting the highway. But in the end we got there, unloaded, and awaited the long days ahead.
Loaded Up.jpg


DD Garage.jpg


Having an actual shop was simply amazing to work in. I'm so used to a small cramped space, it was a game changer. My goal was to drive her on the trailer by the end of the weekend so there was a lot to be done. Over the course of Friday and Saturday, we knocked off a bunch off the list while adding a few along the way as well. It was so good to have multiple hands, eyes, and ears around while we knocked out what we could. I'm truly thankful for all the people who showed up and helped work on her! That includes the families that fed us, people that encouraged us, and those who offered great advise. Thank you ALL!

We focused on the main things that would allow us to get her moving first, then did other smaller things along the way. Some of those included completing the coolant lines, welding brackets and mounts, fixing the bumps, routing vent lines, fluids, finishing the bottom skid, etc. Things were going pretty well until they weren't. Unfortunately once we got the brake system, I over tightened some of the flares which lead to a bunch of brake fluid on the shop floor. It was a big bummer for me, however we were able to use some spare fittings, old buggy parts, and some new goodies to cobble up the brake system. Although not permeant, it works for now, which means I added brake lines back to the list. We also got the coilovers adjusted and reservoirs mounted, trans cooler filled along with the transmission, intake fitted up, worked on the throttle pedal and installed a new tensioner. To say the least, there was a lot that got accomplished and I wouldn't of been able to do it without the many hands involved.
DD Bump.jpg


DD Coilover Res.jpg


Vent Lines.jpg


DD Outside.jpg


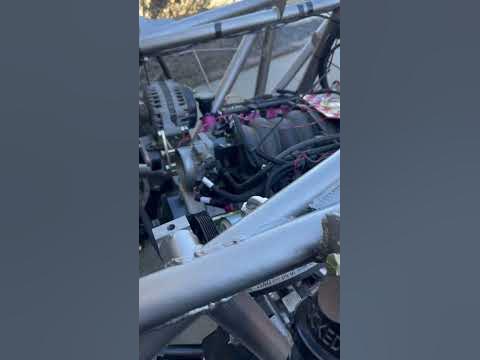
With a lot of time invested over this past weekend, we're one step closer in the overall completion. We pushed Tinkerita out of the garage while we flipped steering lines, burped the coolant system, fixed additional leaks, but more importantly got her running and trans fluid pushed through enough to have some forward motion. Since the exhaust isn't yet complete, the longer she ran the richer she got so we turned her off. After much discussion, laughs, and a sigh of relief, we officially drove Tinkerita onto the trailer... of course with half brakes and super rich running LS1. But we did it!
DD Profile.jpg


With a quick load up, a bunch of goodbye's, and a grateful heart for my friends, I headed back home. There's still a lot left to do, but this weekend was encouraging and I truly feel our deadline can be met. With another long weekend ahead of me and a list that seems to grow, I'm going to make sure this thing is ready!

If you're wondering why April 1st, its not for an April fools joke, but it's opening weekend here in NC at Uwharrie Nation Forest or URE for you locals. Cheers!
 
Back
Top