Crack in head

I worked at a machine shop years ago. Headwork was what I did the most of. All engines have a cut off as to how much can be machined off of them. Before I ever surfaced one, I used a dial indicator to check it to see how much would have to machined off to square and clear up the surface. This was for heads that were being gone through and or owner wanted it checked due to a blown head gasket. Race engines were a whole other story. "If" the reman person of your head did as I did, then there should be no problem with just replacing the head with a quality head gasket. If the cut till it cleared, tat may be an issue. Not sure about the AMC 258, but some engines you can get thicker head gaskets to compensate for more being cut off that should have been. About the only way to check to see if too much has been cut off, is to cc the heads combustion chamber.
Your scaring me...just kidding thanks for the info.
I used a felpro stock style head gasket. It's still working so I guess it's a good one. Most important thing is to follow that torque sequence and put liquid ptfe on the front drivers side head bolt threads.
Will do
Oh and use the good felpro gasket for the intake and exhaust with a good coat of copper spray on the paper side.
I was wondering about gasket. Gasket that I removed was a thick soft silver type.
use a push rod length checking tool to verify.

I would also be sure to drain the lifters in case any are stuck, simple to take apart and drain. Be sure to rotate the engine assembly when you prime the oil pump to get all the air out.
Yep, I was looking at those. The kit was about $80. I'm just going to get one in my rods range for $8-10.
Don't know about draining lifters. You mean drain oil? I will be rotating the engine as I set TDC on intake stroke - - (Is that right) for each set of rockers and torquing
 
You mean drain oil?
yes, remove the clip and drain the oil. I have rebuild engines in the past using the same cam and lifters and destroyed the cam bearings because the hydraulic lifters did not immediately self adjust. Drain them and let the oil pump refill when you prime. Also don't mix them up from the cam lobe they were on.
 
And yes you want both valves in the closed position to torque the rockers. When Jeff talks about priming, he's meaning that when its all back together, you want to leave the valve cover off and with the ignition disconnected crank the engine until all the lifters are pumping oil into the rockers before starting the engine.
 
And yes you want both valves in the closed position to torque the rockers. When Jeff talks about priming, he's meaning that when its all back together, you want to leave the valve cover off and with the ignition disconnected crank the engine until all the lifters are pumping oil into the rockers before starting the engine.
Ok. I was thinking isn't everything already primed? Why drain? Won't I be able to tell if a lifter is stuck when rotating crank to get TDC by watching rods? I won't be needing to refill drain/lifters or remember order...will I?
Thanks
 
Last edited:
When Jeff talks about priming, he's meaning that when its all back together, you want to leave the valve cover off and with the ignition disconnected crank the engine until all the lifters are pumping oil into the rockers before starting the engine.
wrong, that is in no way what I meant.

it's best practice to rotate by hand and use a drill and prime tool to spin the oil pump through the distributor hole. I use an old distributor with the gear removed.


Why drain? Won't I be able to tell if a lifter is stuck when rotating crank to get TDC by watching rods? I won't be needing to refil drainl/lifter lifters or remember order...will I?
the lifters are pumped up with oil, when you reassemble they will there is a possibility because they are pumped up they can cause excessive force on your cam and thus the bearings. I only offer this advice because I have experienced cam bearing failure from not draining the lifters. Some get lucky, some don't.
 
wrong, that is in no way what I meant.

it's best practice to rotate by hand and use a drill and prime tool to spin the oil pump through the distributor hole. I use an old distributor with the gear removed.


the lifters are pumped up with oil, when you reassemble they will there is a possibility because they are pumped up they can cause excessive force on your cam and thus the bearings. I only offer this advice because I have experienced cam bearing failure from not draining the lifters. Some get lucky, some don't.
My bad. I was a lucky one then.
 
wrong, that is in no way what I meant.

it's best practice to rotate by hand and use a drill and prime tool to spin the oil pump through the distributor hole. I use an old distributor with the gear removed.


the lifters are pumped up with oil, when you reassemble they will there is a possibility because they are pumped up they can cause excessive force on your cam and thus the bearings. I only offer this advice because I have experienced cam bearing failure from not draining the lifters. Some get lucky, some don't.
Ok Jeff, remember I'm a newbie to anything internal. So anytime someone replaces a head,rockers pushrods...the lifters need to be emptied then refilled by oil pump via drill cranking the distributor? I can't safely just rotate the crank until the oil already in the lifters feeds back through the new pushrods?
 
Ok Jeff, remember I'm a newbie to anything internal. So anytime someone replaces a head,rockers pushrods...the lifters need to be emptied then refilled by oil pump via drill cranking the distributor? I can't safely just rotate the crank until the oil already in the lifters feeds back through the new pushrods?
this is my advice from the experience I have had building a few stokers and head replacement jobs. Since the crank and connecting rods are not being removed. you can safely spin the engine with the starter. I was under the impression you were going through the engine bottom end also. since it's just a top end you should be fine with out pulling the lifters and draining them. Sorry for the confusion.
 
Hah! No problem, I just appreciate the help you and others give here in many subjects.
 
Be prepared to make a mess when the old head comes off. You're going to get a lot of green down the bores. I haven't found a good way to get all the antifreeze out of the head before pulling it. Keep in mind this bastard is heavy for one person. Bring a friend. Do your best to get all the coolant out of the cylinders. I dried mine the best I could then washed down the pistons and cylinders with WD40. You'll want to change your oil (mixed with coolant) before you restart the engine. Run it up to temp on clean oil then change it again.
 
this is my advice from the experience I have had building a few stokers and head replacement jobs. Since the crank and connecting rods are not being removed. you can safely spin the engine with the starter. I was under the impression you were going through the engine bottom end also. since it's just a top end you should be fine with out pulling the lifters and draining them. Sorry for the confusion.

Be prepared to make a mess when the old head comes off. You're going to get a lot of green down the bores. I haven't found a good way to get all the antifreeze out of the head before pulling it. Keep in mind this bastard is heavy for one person. Bring a friend. Do your best to get all the coolant out of the cylinders. I dried mine the best I could then washed down the pistons and cylinders with WD40. You'll want to change your oil (mixed with coolant) before you restart the engine. Run it up to temp on clean oil then change it again.
Thanks, will do.
 
Where do y'all get parts from?
I've been making a list of items I need but most kits I see include various gaskets and such I don't need. Costs are adding up quickly.
Reman. Head purchased 400 +
Head gasket
Head bolts
Rocker arms,bridges,pivots,pushrods
Adjustable pushrod to check proper rod length.
Thermo and gasket
Intake and exhaust gaskets/bolts,washers
Valve cover gasket cork or rubber?
Assembly fluid
Anti freeze
Oil/filter twice
Sealer for bolt #11

Anything else?
New valve cover. PO ground off factory lip on Clifford aluminum VC in places. No wonder it leaked.

I imagine getting all above would be tough at parts stores. Orilleys said they had four of the 12 rockers....

online sounds like best bet. Who would y'all go through?

Thanks
I didn't change rockers, bridges or pushrods so no help there. Gaskets were rock auto. Liquid ptfe was at napa. Most parts houses will have it. Thermostat and gasket was autozone. Sucks about the valve cover. I still fight with mine since its plastic and leaks like its not there. Ive tried all different gaskets on it except the felpro permadry. Cork gaskets are about useless. Head bolts were all in good shape (except the actually broken ones in the the replacement engine. I reused all of the good ones and borrowed from the bad engine for the broken ones. It worked for me. They are not torque to yield bolts on the 258. I cleaned them, chased the threads in the block and torqued them down with no issues. YMMV. Fluids were all walmart.
 
Yep some of that list I will source locally.
As far as head gasket I've read that the felpro permatorque is a little thicker and forgiving. Also ads back some height so oem pushrods may be used. Replacing head bolts because I read they can only be used twice. I think current head may be a reman.. Don't know how to tell but plan on checking new to old height with digital caliper I picked up from HF
As far as intake exhaust I have offenhauser intake and unknown brand headers for exhaust. Don't know what gasket is best for this setup? It had a thick silver one that leaked coolant and had a exhaust leak.
Some say I need to double up gaskets on exhaust. Mine only had one.
 
Be prepared to make a mess when the old head comes off. You're going to get a lot of green down the bores. I haven't found a good way to get all the antifreeze out of the head before pulling it. Keep in mind this bastard is heavy for one person. Bring a friend. Do your best to get all the coolant out of the cylinders. I dried mine the best I could then washed down the pistons and cylinders with WD40. You'll want to change your oil (mixed with coolant) before you restart the engine. Run it up to temp on clean oil then change it again.

There is a block drain plug on the driver's side of the block, usually has a 5/16" recessed square head (a 1/4" ratchet won't work). Remove it and you fully drain the block. This greatly reduces coolant entering the cylinders when you pop the head off.
Just food for thought :beer:
 
Yep some of that list I will source locally.
As far as head gasket I've read that the felpro permatorque is a little thicker and forgiving. Also ads back some height so oem pushrods may be used. Replacing head bolts because I read they can only be used twice. I think current head may be a reman.. Don't know how to tell but plan on checking new to old height with digital caliper I picked up from HF
As far as intake exhaust I have offenhauser intake and unknown brand headers for exhaust. Don't know what gasket is best for this setup? It had a thick silver one that leaked coolant and had a exhaust leak.
Some say I need to double up gaskets on exhaust. Mine only had one.
Your intake/exhaust gasket should have nothing to do with coolant leaking. I used the felpro gasket that is metal on one side
Use copper spray on the non metal side. I run a header with a stock intake. There is a thickness difference but using the stock manifold bolts with the funky shaped washers that bend to shape it holds both just fine.
 
There is a block drain plug on the driver's side of the block, usually has a 5/16" recessed square head (a 1/4" ratchet won't work). Remove it and you fully drain the block. This greatly reduces coolant entering the cylinders when you pop the head off.
Just food for thought :beer:
Where the hell were you 2 months ago?:laughing:
 
Your intake/exhaust gasket should have nothing to do with coolant leaking. I used the felpro gasket that is metal on one side
Use copper spray on the non metal side. I run a header with a stock intake. There is a thickness difference but using the stock manifold bolts with the funky shaped washers that bend to shape it holds both just fine.
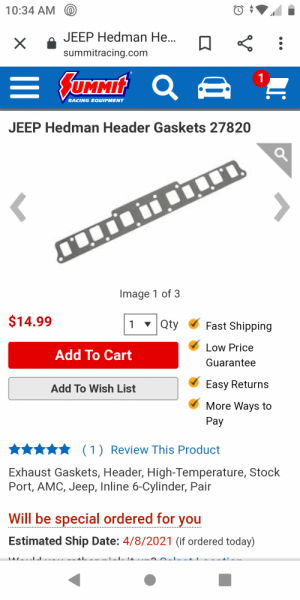
Good to know 🤭 Found gaske belowt that is made for headers

Helping you posers fix your junk.
Just like I have since 2005
It’s been cool to see the forum coach this guy along and give him real help!
Couldn't do it without this forums help. Thanks to all,....wait a minute, I haven't done it yet 🥺
 

Attachments

  • Screenshot_20210318-103423.png
    Screenshot_20210318-103423.png
    231.9 KB · Views: 102
Good to know 🤭 Found gaske belowt that is made for headers


Couldn't do it without this forums help. Thanks to all,....wait a minute, I haven't done it yet 🥺
That one works fine. You'll want copper rtv spray on both sides of it. I used one when I was chasing my head gasket leak that happened to be right below my #1 cyl exhaust port. I was convinced it was the manifold gasket or the header or a combination of both. Tried all different kinds of gaskets and even bought a new header that I never ended up using once I realized I was chasing the wrong problem. The gasket was blown because that head bolt was broken at the block but the rest of the bolt was still stuck in there making it look like it was still one piece. Lots of fun was had and I can no do the job in about 3 hours lol
 
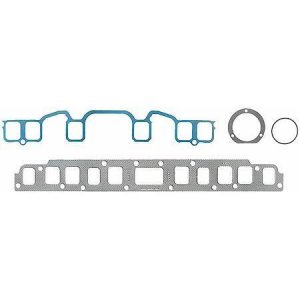
Thanks for the info.If you don't mind what's the blue gasket in this kit for?
 

Attachments

  • 16160819024447210306962035889138.jpg
    16160819024447210306962035889138.jpg
    20 KB · Views: 87
Intake ports. It goes between the face of the full gasket and the intake manifold.
Ok, and no copper spray either side? I also read something about high heat silicone being applied somewhere...I forget where
 
I never did on the blue one. The copper spray is the high heat silicone. After you spray it on, let it tack up a little before putting the gasket on. It'll help hold it in place. Be careful with that stuff, it floats around and gets on everything.lol
 
Back
Top