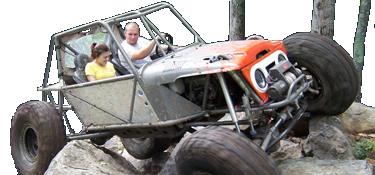
97 TJ - "Second Chance"

Falko

Well-Known Member
Joined
Mar 20, 2005
Location
Winston-Salem
I hadn't originally intended to post a build here so my pictoral documentation isn't great, but most of the people that I have been purchacing parts from have expressed interested in the progress, so I figure this would be the best way to keep those interested up to date. It will also be a good way to kill some time while I'm waiting in airports this week.

I had been wanting an open top rig for a while; The Jeep I found to start the build came from Craigslist just down the street from work. This will be my second Jeep build, and after picking this thing up, it was imediately clear that this Jeep had lived a hard life before; it needed a second chance at life. (hence the name)

Here she is after ariving home on the trailer: I bought it with a known engine failure, though the extent of the damage was unclear at the time:
1.jpg


The specs rolling off of the trailer: 1997 TJ, 4cyl, AX5, D30/35, blown engine

The 30,000 foot view was good: no severe body damage, decent top, and a good price to go along with the engine that would only rotate 180 degrees. Closer inspection revield more about this jeeps previous life: mud everywhere (and i mean everywhere), severe fluid leaks, cut wires in the harness, everything made from plastic was broken, and much evidence of aftermarket parts that had since been removed.

My plan at the time was to tear into the engine and see what was up. If it was easily repairable, then I would go that route for the time being and do the aesthetic and drivetrain upgrades first. That being said, the only portion of the build that had a solid plan from the begining was the engine. This Jeep, at some point, would be V8 powered.
 
The first thing I did was drop the oil pan; here is what I fished out:
20130310_173125.jpg


Chunks of cast aluminum pointed to some severe piston damage. I wasn't disappointed when it was all torn apart:
20130310_163856.jpg


To top that off, I found a nice big crack in the cylinder wall of the damaged piston:
20130310_163823.jpg


This engine was done. Time to find a donor.
 
The first thing on the list was to get the engine bay stripped down. It took about two hours of pressure washing to get it semi clean to begin work:
20121009_181957.jpg


This is where the project stalled for a while; finding a good donor proved more difficult than expected. It did give me plenty of time to decide the direction of the project though.

I didnt want to build a street Jeep, but the main duty of this rig would be hitting the road and heading to the coast or to Ashville with something nice to look at in the passenger seat. Weekend wheeling capability will certainly be required, but for driving pleasure, a full body and manual transmission will be retained.

After about two months, I scored a hemi powered Ram from Copart. Here it is comming off the trailer, slight mishap:
20121013_185100.jpg


Time to start chopping it up
 
Last edited:
Sweet! Looking forward to watching this build.
 
First thing was to run a complete operational checkout on the engine before pulling it out of the truck. The only problem that uncovered was a coolant leak from the water pump. No big deal, ill go ahead and replace it while the engine is out.

Since i'll be using a harness from Hotwire auto, minimal organization was needed during removal, so the engine came out fairly quick:

20121028_141759.jpg

20121028_152855.jpg
 
As you can see, my workspace is very limited. That made my next order of business to get the donor carcass gone. I sold a bunch of parts, then stripped anything else of value before calling 109 to come drag it out of my driveway. Here is what it looked like when getting hauled off:
20121119_074136.jpg

20121119_074121.jpg

20121119_074149.jpg
 
I was going to do something similar with mine, but with a 5.9 grand cherokee from Coparts. I wanted to keep it a manual and found it tough and expensive to find a manual and ecm to make it work. May still do it one day. Looking forward to following this, let me know if you need a hand tinkering I'd love to help.
 
I was going to do something similar with mine, but with a 5.9 grand cherokee from Coparts. I wanted to keep it a manual and found it tough and expensive to find a manual and ecm to make it work. May still do it one day. Looking forward to following this, let me know if you need a hand tinkering I'd love to help.

You're right. It did definitely cost more to stay manual. Luckily Chris at Hotwire reprogrammed my ecu from the donor truck for the manual transmission, so I didn't have to worry about that part.

Also, im always down to drink beer and turn wrenches when anyone wants to come by.
 
More on that manual transmission:

After much deliberation, I decided that I would track down a Getrag 238 six speed manual that was featured behind the 4.7 in both the Ram and Dakota. The Dakota version is setup ready to go for a TJ, but they are much more rare and expensive than the Ram model. The only difference between the two are the shifter locations- forward is Ram, rear is Dakota:
20121128_181305.jpg


Upon closer inspection you'll see that even though the case has both locations, the shift rail does not. A bit of disassembly, machining, and reassembly remedied that problem:
20121128_181819.jpg

20121128_194137.jpg

20121201_122222.jpg
 
Last edited:
I was going to find a Trans and ecm out of a 5.9 Dakota of 98 or 99. You have clearly done more research than I did.
 
After the transmission was sorted, I tacked in the engine mounts and threw the powertrain in for a quick test fit:
20121201_161423.jpg


Checking out where the shifter ended up. As you can see the rear location is even still a bit far forward; the Ram location would have required heavy floor modification.
20121201_161550.jpg


The last thing that was noted during the test fit was the relation of the oil filter to the upper control arm. This is going to be one of the potential problems with running a low suspension height:
20121201_161433.jpg
 
After all the clearances were checked and a few measurements taken, the drivetrain was pulled back out for final welding of the engine mounts. I used the AA hemi mounts purchased from Oliver's for ease and simplicity; well worth it in my mind.
20121202_122101.jpg


Before re-docking the engine, the water pump, exhaust manifolds, and wiring harness were swapped out. The EGR system was also removed. Here's the engine in its final location with the fenders back on:
20121227_170356.jpg
 
After being out of the country for a while, the engine bay was finally starting to take shape. At this point power steering lines, fuel evap routing, heater hoses, radiator and hoses, and battery cables had been finalized:
20130206_175717.jpg


The only remaining items in the engine bay that need attention are the radiator surge tank and the air filter with associated plumbing. At this point my exhaust arrived, so I shifted focus to the underside of the jeep.
 
The exhaust system came from JeepSpeedShop. After talking to them on the phone, I knew I was going to have to modify it slightly to make it work with my setup, but the kit wad much cheaper than the quotes I got to have a full custom fabbed. Here's the muffler from the kit; shouldn't be too restrictive:
20130206_215457.jpg


The kit installed fairly easily, and the only part that needed modification was the crossover pipe to account for the extra bellhousing size of the getrag:

20130309_100458.jpg


This pipe wasn't on the heep for too long though. I discovered that it would be the new limiting factor to suspension jounce, and a 2" lift would be required to even install the driveshaft. Unacceptable. On top of that, the O2 sensor harness wouldn't reach, so I fabbed a completely new pipe that is significantly mote ghetto looking, but has much higher clearance:
20130310_161251_wtf.jpg
 
Last edited:
Figured I would come back and update this thread since the Jeep is now out of comission until the next build portion (read: repair) is complete.

At the point above, the majority of the work was done underneath. The last thing was testing clearance on everything, which is when I found the interference of the control arm and oil filter at full compression. I thought about doing a remote mount filter, but decided to go with extended bump stops for now.
uploadfromtaptalk1387048998149.jpg


Next, I moved on to the inside. Again here I was looking for a factory look, so I wanted to keep the oem console. This required a new tunnel cover, some shifter "customization", and homebrew twin sticks for the D300.
uploadfromtaptalk1387049325635.jpg

uploadfromtaptalk1387049436156.jpg
 
Here is the completed phase 1 pic. Cape lookout in mid November:
uploadfromtaptalk1387125731468.jpg


And courtesy of a jersey barrier on 77, the start of phase 2:

uploadfromtaptalk1387125849737.jpg


It doesn't look bad until you look closely. Two wheels, one tire, lca, trackbar, tie rod, front driveshaft, and an engine mount were damaged. Time for some upgrades

uploadfromtaptalk1387126058685.jpg
uploadfromtaptalk1387126090571.jpg
uploadfromtaptalk1387126182860.jpg
 
Damn, That was a pretty good lick.

Nice build so far. How does it drive / handle with the motor swap?
 
Damn, That was a pretty good lick.

Nice build so far. How does it drive / handle with the motor swap?

Its drives great. I had basically parked my GTO for six months because this thing provided all the V8 fun I needed.

The original build was flawed though, and that's what lead to the mishap. Without traction control, having an open dif, and the low corner weight of a stripped out wrangler, it was too much to ask of one truck tire to put down 345 HP; especially when wet. That will be remedied in this phase
 
It seems I have found the source of the front axle offset, and it wasn't the track bar... it is the bracket.

The cast bracket is actually bent, and the weld has a nice crack propagating through it. Working on a repair, hoping to get it done for the jamboree next weekend.

uploadfromtaptalk1396314314755.jpg
 
Well I didn't end up getting it finished in time to take to the jamboree; I neglected to get the front shaft to the shop in time to get re-tubed, but its back driving again.

Cutting the trackbar bracket off the frame might have been the biggest pain in the ass ever:
uploadfromtaptalk1396916967078.jpg


Re-fitted a new bracket that allowed me to use a double bushed trackbar for future upgrade-ability. Also cheated the bracket as far forward as possible.
uploadfromtaptalk1396917145354.jpg


Using an OEM wj track bar for now; the axle is nice and centered again.
 
Also got the 8.8 in. No construction pics, as its been done a million times before. Disc braked, 4.10 with OEM limited slip, IRO brackets and a solid diff cover:

uploadfromtaptalk1396971981508.jpg


The performance difference with the limited slip is huge. It was definately the right way to go
 
Back
Top