Warrior Welding LLC shop.

Not a pipe welder. Today I played one. Outside the shop work. Firetruck fabrication.
IMG_20240515_184855883.jpg

IMG_20240515_184909363.jpg
IMG_20240515_184919397.jpg


Got to have the hood to do pipe I guess! 😆
IMG_20240515_184948871.jpg


More I worked at it the better it got....but pipe and stainless is my hardest welding to master.
 
On a serious note is it just an old school vibe or trend to wear fixed shade hoods or pancakes as opposed to an auto? Or is there legitimacy to it all??
 
On a serious note is it just an old school vibe or trend to wear fixed shade hoods or pancakes as opposed to an auto? Or is there legitimacy to it all??
Good question. I have both and had both at the shop at this time. The auto shade ate its batteries. It kill them and I'm about ready to shelve it. Fixed lens in a high quality glass still beat any tech hands downs for clarity.

And for the sugar scoop. I was set up and kept getting to much back light from the shop lighting. LEDs rock but not in the back of your hood. The scoop blocked more light and I don't own a pancake set (yet!).....the scoop also fits hard hat rigs much better and offer much better protection. My hard hat clips in and out in seconds. I want own another hood without a flip lens either, which the scoop also sports. The scoop isn't a fancy carbon unit but I swear the hard hat head gear wears better and breathes a little. Plus it's huge and will hold a bunch of stickers😜

Edit: I can buy multiple scoops for what I paid for one of my auto battery eaters.
Edit number two: you can scrub the crap out of a uncoated glass lens, not so much the gold coated units. Electronic helmet the product can't be cleaned with much. Maybe a soft eye glass cloth. Just short of forgetting to cover them with a cover plate or dropping them they last forever. I had some old stock with probably twenty years on them. Little glass cleaner and rocked them.
 
Last edited:
Former student nailed the plasma work on this plate. I executed the small bores. The center shape and slot was perfect. Remember MudPro? Well this fellas machine and setting would give him a run for his money, lol! Love em both!
13968.jpeg

All healed up.
IMG_20240518_165953185.jpg

Edit: big shout out to Dave at Olivers Drive Line and Gear for fixing me up with a metric AG ujoint in stock and installed in that hateful set of yokes!
 
Last edited:
Before finishing the Eurotech machine I went and modded a good ol American iron hay bailer, Ford.
IMG_20240511_121651228.jpg
one of my favorite tools...but it's gonna cause a hernia 😀
IMG_20240511_115029695.jpg

Some beef to wrap the axle with.
IMG_20240511_152202581_HDR.jpg

Little bracing and we now have wagon hitch.
IMG_20240511_152315824.jpg

Probably ranks with one of the hardest places I've crammed my head into to weld. Wasn't weld porn but it ain't coming loose.

One hundred percent 7018 if any body is wondering. Same for the European built unit above.
 

Attachments

  • IMG_20240511_110253916.jpg
    IMG_20240511_110253916.jpg
    264 KB · Views: 18
Last edited:
Father son project. @Blake_JK . He wanted a trailer. I suggest that we work together on one. Classic Warrior Welding style it may have snowballed a little in the beef department.
IMG_20231026_170300517_HDR.jpg

This was October playing catch with the frame.
Everything we looked at commercial was in our eyes overpriced junk.
What we came up with was higher investment,😜not junk. I've told people for years you want build a better trailer cheaper for what you can buy. Pick your poison and deal with it.
3 inch junior channel frame, 2 by angles in 1/8, 3 by 3 by 3/16 tongue.
Springs packs with multiple leafs and axle with same lug as his Jeep.
Weight rating 3k or 3500 can't remember.
 
Super proud at how the unit turned out. Blake did 95 percent of everything. I welded a few components in the realm of tongue and axle and he did the rest. True father and son we debated a lot of details and planned four times. Not much flashlight tutorials at his age. His work schedule is probably crazier then mine. Several weekends later nights and taking time when available he has himself something he built.
IMG_20240518_175102650.jpg

Little something different from trailers store bought.
IMG_20240518_175117876.jpg

Rear view shot.
IMG_20240518_175124930.jpg

Details. Blake has a few more pictures and details on the details.
I hope he has wiring shots. It's tiddy and way better then I might have done.
 
To add on to @WARRIORWELDING post, this is the frame of the trailer. 3/4 holes drilled on the right and left side through all the joist for wires to pass through. For whatever reason I did not photograph the wiring. All the wires are run in wire loom through the 3/4 holes with a rubber grommet. All heat shrink conectors.

IMG_2903.jpeg


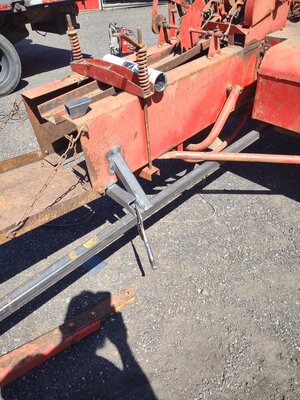
Tongue/Axle day. Welded a washer under the tongue and several inside the channel to have a zip tie point and hide the wires in a clean way.

IMG_2914.jpeg


Used diamond deck in the front in hopes to never have to change the E-Track locations. Should be able to haul 3 motorcycles on this trailer and have a good amount of room. E-Track should allow for a little bit of adjustablity with different width handle bars. 3 weld on D-Rings are on each side of the wood deck as well. Just not included in the next pictures.

IMG_3080.jpeg


IMG_3082.jpeg


Decided that I wanted to keep some ramps with the trailer all the time and have some that were wide enough for a 4 wheeler, side by side, lawnmower, etc. Not just a motorcycle trailer like I originally was planning on. Decided it needed to be universal. Ramps are held in with a master lock to keep things simple.

IMG_3144.jpeg


imagejpeg_2.jpeg


IMG_3154.jpeg


Then it was time for tear down and paint! First time painting something without a rattle can and using a painters gun. Not bad but not great at it either. 2 coats of paint and almost a gallon used. My favorite part about the fenders is that they are removable!

IMG_3225.jpeg


Like I said earlier, no wiring pictures but the finished product behind the Jeep! Excited to use it and get back to the tracks! Thanks to @WARRIORWELDING for the help, patience, and letting me hoard a section of the shop!

IMG_3285.jpeg
 
Last edited:
IMG_20240524_155848342_HDR.jpg

These chips don't look like much but they are the result of a lot of years wishing wanting and plain trying to decide if it's worth it.
IMG_20240524_121149392_HDR.jpg

What I started with. Little scored and a pattern left by the old bushing. This unit wasn't terrible but the inserts were a slip fit. No Bueno for longevity. They pulled this one right when they should have. Perfect learning canvas.
IMG_20240524_160524372_HDR.jpg


Cleaning cut.
 
Well if you don't know what I'm up to from the above here's some more clues.
IMG_20240524_155843182_HDR.jpg

I may or may not be welding machining addict.🤔😜😂
IMG_20240524_171952064.jpg


My first ever bore weld. I broke that down and didn't get a picture. Hope to video some of the next one. I was on my toes watching and learning.

Must say I haven't had this much fun with my clothes on in a long time!

Lots to learn and this is a tight fit for the bar size and welder. The little cup and diffuser is maybe 5/8 long. Running .030 wire. Bar is a 1.75 diameter. Learned I'll bridge some offsets next time to see and work the hole better.
 
Finish bore
IMG_20240525_192710563.jpg


We hit within.0015 of what we where shooting for. All the while we was adjust speeds and feeds to see what it would do. We also cut the entire weld and bore with a Cobalt HSS lath bit. @Blake_JK wants to try one of the fancy insert tool holders next.

After this pic we ran a hone through it and landed right on the money.
Bushes pressed in tight and slick! Once we modify the wrong pin they sent to the right configuration it'll be ready to go back together.
 
Was great to drop by and visit a while! Need to do it again soon.
 
Was great to drop by and visit a while! Need to do it again soon.
Yes sir was a good little break too! Storm ran us inside a few hours after you left. We ran into a couple head scratching moments but we figured out a couple slick work arounds.
 
Friend of mine does trenching and bores with this unit. He discovered an unscheduled come apart. By the looks of it all it's been happening for a long time prior to his ownership. This unit is one of three rigs he owns. He gutted the fragments and brought me the bushing so I could start.
IMG_20240531_113425342.jpg

The canvas.
IMG_20240601_093159603.jpg

Pretty intensive tear down. This is the back fill blade end and the pivot point. It's also the end that takes all the boring loads.
IMG_20240601_093208042.jpg
 
First order was making all the right plates and gutting the unit of fragments.
IMG_20240601_134433426.jpg

With blank slate. I got to making a metal sandwich.
IMG_20240601_134352384.jpg

Welded in some stiffener plates. The old unit has two little dows welded on one side like plug welds. It also buckled at these locations
IMG_20240601_134420935.jpg
 
Access was sort of tight but not horrible. I managed to double bevel all the plate. The gaps allowed me to root all the welds with 6010 like a pipe. 7018 fill and cap.
The underneath wasn't horrible wasn't excellent.
IMG_20240601_190018836.jpg

IMG_20240601_185928207.jpg

IMG_20240601_185936839.jpg

After this I welded up several cracks in the push frame for the blade and the pivot plates for the hydraulic cylinders was in two pieces. Sewed that up and put some meat back on the chain ring and called it a day after 13 hours of grinding, cutting, fitting, and welding......tard.
 
Access was sort of tight but not horrible. I managed to double bevel all the plate. The gaps allowed me to root all the welds with 6010 like a pipe. 7018 fill and cap.
The underneath wasn't horrible wasn't excellent. View attachment 418645
View attachment 418644
View attachment 418643
After this I welded up several cracks in the push frame for the blade and the pivot plates for the hydraulic cylinders was in two pieces. Sewed that up and put some meat back on the chain ring and called it a day after 13 hours of grinding, cutting, fitting, and welding......tard.
The main welder I use stays backed up on trenching and boring rigs. One Mexican dude randomly stopped by his shop one day to see if he could do a repair and then bam, the whole trenching community started to bring him their rigs. Any time I stop by he has no less than ten plows on the table for hard facing.
 
Back
Top